Recipes
Beverages
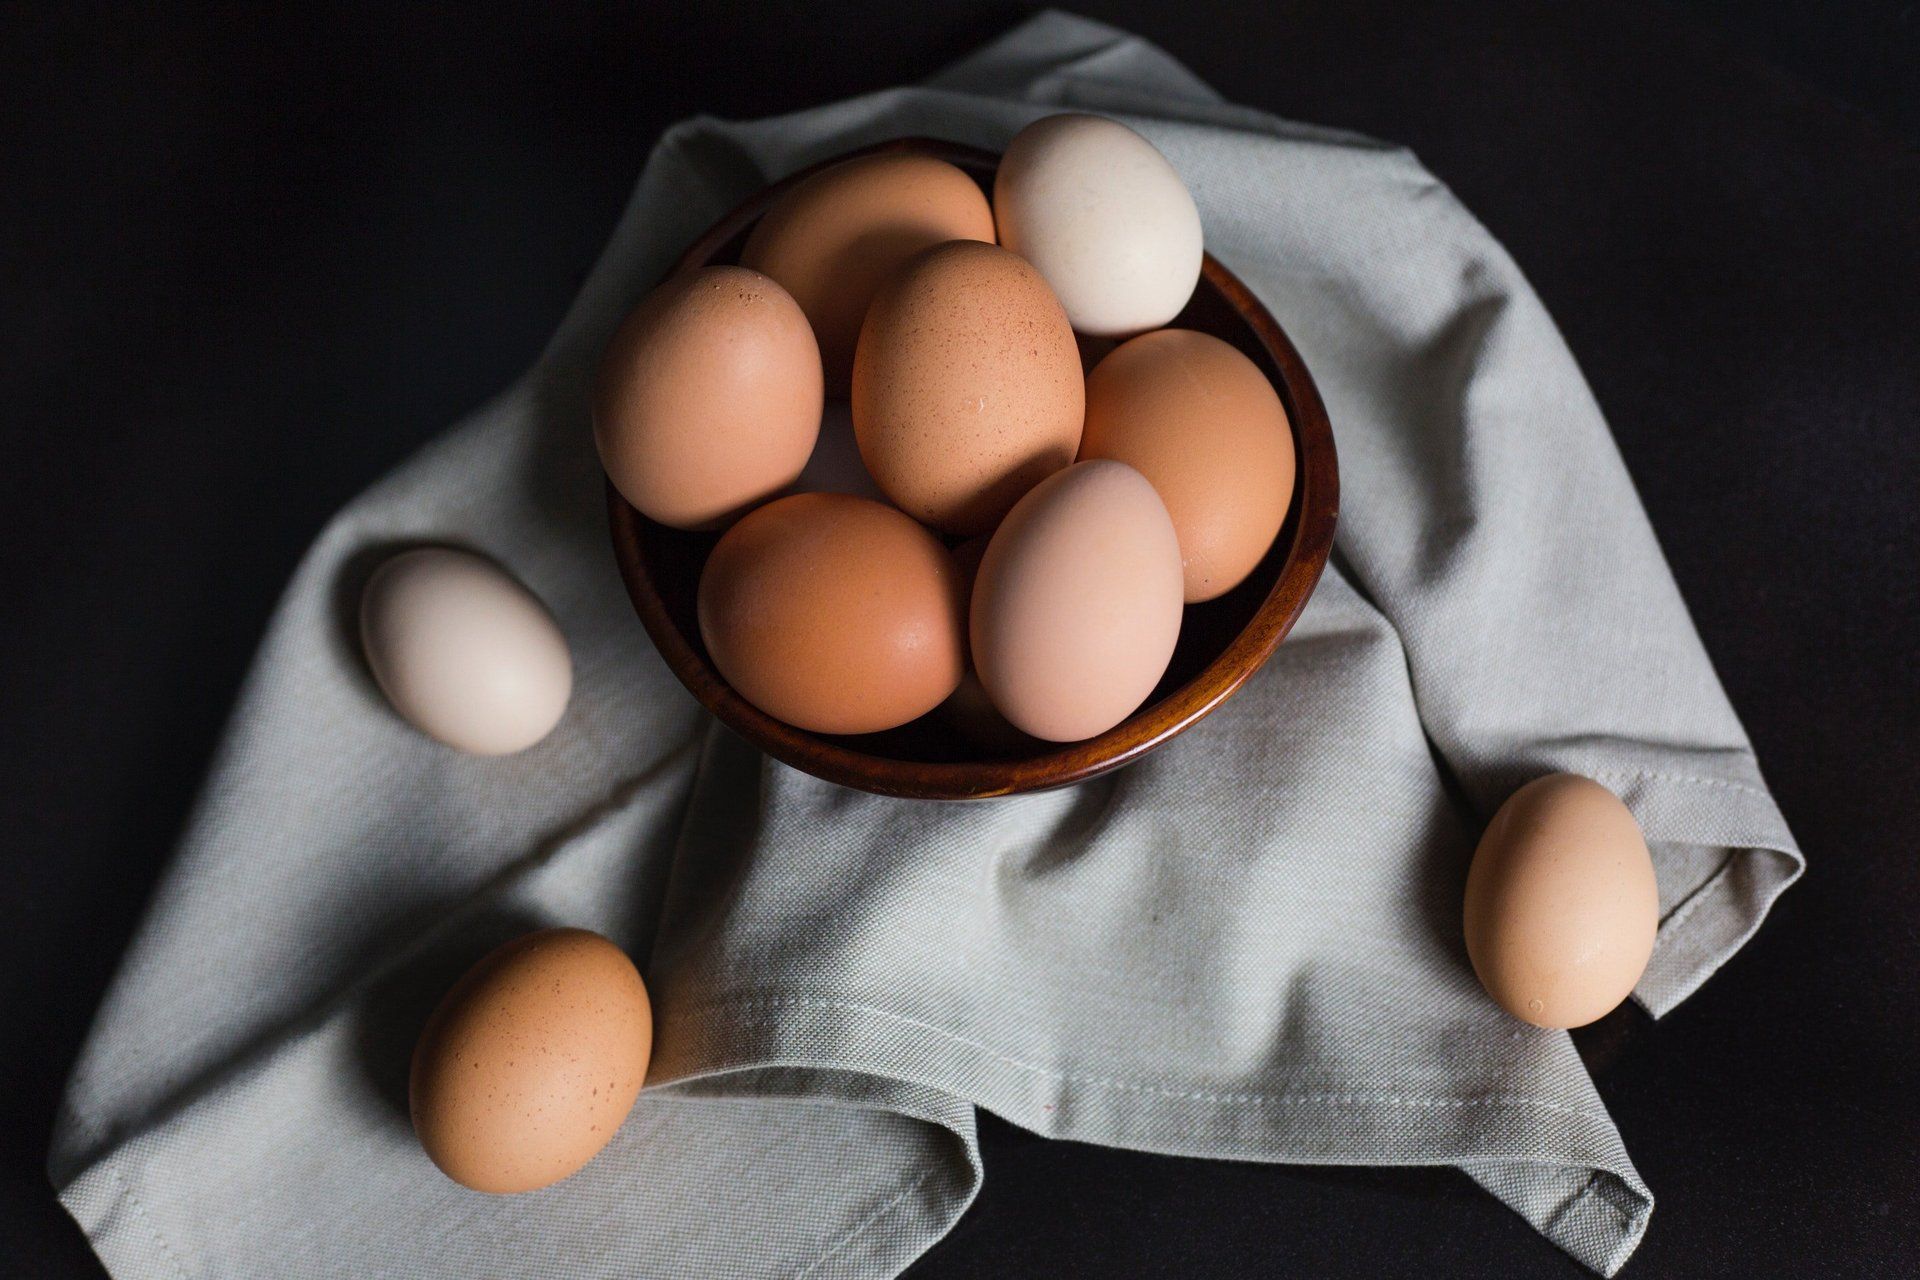
I love a good food story from friends and readers. My friend, co-worker, and great cook, Veanna Roberson, tells me her family cannot imagine a Christmas without boiled custard. It is anticipated by the entire Roberson family every year. This heirloom recipe has been handed down in Veanna’s husband’s family for generations. He remembers his grandmother making this every Christmas, and even freezing it in ice trays as a treat for the kids. His mother took over the tradition, and now it has become an annual Christmas tradition for Veanna to serve the boiled custard each and every Christmas season. Boiled custard is considered to be a liquid dessert. It is also known as “drinking" custard. It resembles the base for eggnog but without the “nog” so it's family-friendly and very festive. Interestingly, boiled custard is not actually boiled. The name is tricky, in that if the mixture is boiled, it will curdle. The recipe simply calls to bring the temperature of the milk mixture to a scald by slowly heating it until steams comes from the pan. Boiled custard has been around for centuries and came to the U.S. from England. Variations of this recipe have been passed down in many families, just as it has been in the Roberson family. Boiled Custard 6 eggs 1 quart milk, plus more to top off the pitcher 2 ¾ cups sugar Pinch of salt 2 tablespoons vanilla 2 tablespoons flour Separate eggs and reserve egg whites for later use. Whisk together eggs yolks, 1 quart milk, sugar, vanilla, flour and salt. Cook in large saucepan or stockpot over medium heat to scald. Stir often and do not let boil. Beat egg whites into stiff peaks with mixer. When the milk mixture begins to steam, it is at a scald stage. Add the egg whites a little at a time and continue to cook, stirring constantly, until you see steam coming from the mixture again. Pour into a pitcher and add enough milk to make a gallon. Refrigerate until ready to serve. Makes 8 to 10 servings. Top with a sprinkling of fresh nutmeg and/or fresh whipped cream, if desired.
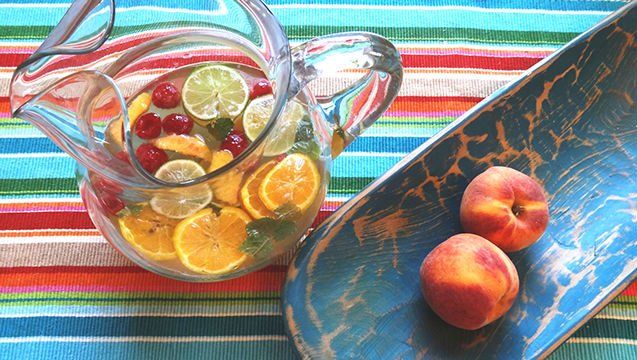
Peachy Sangria 2 fresh peaches 2 small oranges 2 limes 1/4 honey dew melon, peeled and deseeded, cut into bite-size pieces 1/2 cup red raspberries 1/4 cup fresh mint leaves 1 tablespoon sugar 2 bottles of your favorite white wine 3 tablespoons honey Rinse all fruit under cool water and pat dry with towel. Cut peaches into wedges and place half the wedges into a 2 quart pitcher. Cut 1 orange and1 lime into thin, round slices and add to peaches in pitcher. Juice the remaining orange and lime and add juice to pitcher. Add raspberries. Mix mint leaves with sugar and slightly crush the mint with the back of a spoon, then add to pitcher. Add wine and honey to pitcher and stir to combine. Chill and let flavors combine for an hour or so. When ready to serve, use remaining peach wedges to garnish glasses.
Breakfast
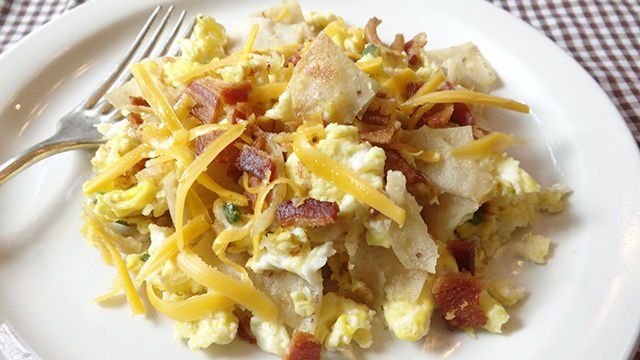
Migas is a Spanish word that translates to “crumbs” in English. The addition of small pieces of corn tortilla turns this eggstravaganza into migas. Some versions call for tortilla chips, while others use torn pieces of soft corn tortilla without crisping them in a skillet. I prefer something in between - after cutting 1 inch pieces of tortilla, I place them in a small amount of hot oil, just long enough to start browning but remaining a little chewy. Other variations are accomplished by adding browned, crumbled breakfast sausage or chorizo. Or add fresh tomatoes and green onion. This is a great way to use up bits and pieces of leftover tortillas. And keep in mind, when you get ready to throw away the remnants in the bottom of your tortilla chip bag, try stirring them into your next pan of scrambled eggs. This will make the process even easier. Migas Made with Corn Tortilla 4 corn tortillas 2 to 3 tablespoons vegetable oil 8 eggs 3 tablespoons milk Salt and pepper to taste (omit salt if using salty tortilla chips) 1 tablespoon butter 1 fresh jalapeno, deseeded and finely diced Toppings: crumbled bacon and grated cheese Stack tortillas and cut into 1 inch squares. Heat oil in skillet over medium heat. Add tortilla pieces, stirring to coat with oil. Let brown, slightly. Scoop out and place on paper towels to drain. Whisk eggs, milk, and salt and pepper in small bowl and set aside. Heat large skillet over medium heat and melt butter. Add diced jalapeno and stir. Pour in egg mixture and begin to scramble with whisk or fork. Add tortilla pieces and stir, cooking until eggs are done, 1 or 2 minutes. Plate migas and add desired toppings, such as crispy bacon and cheese, or fresh cilantro and salsa. Makes 4 servings.
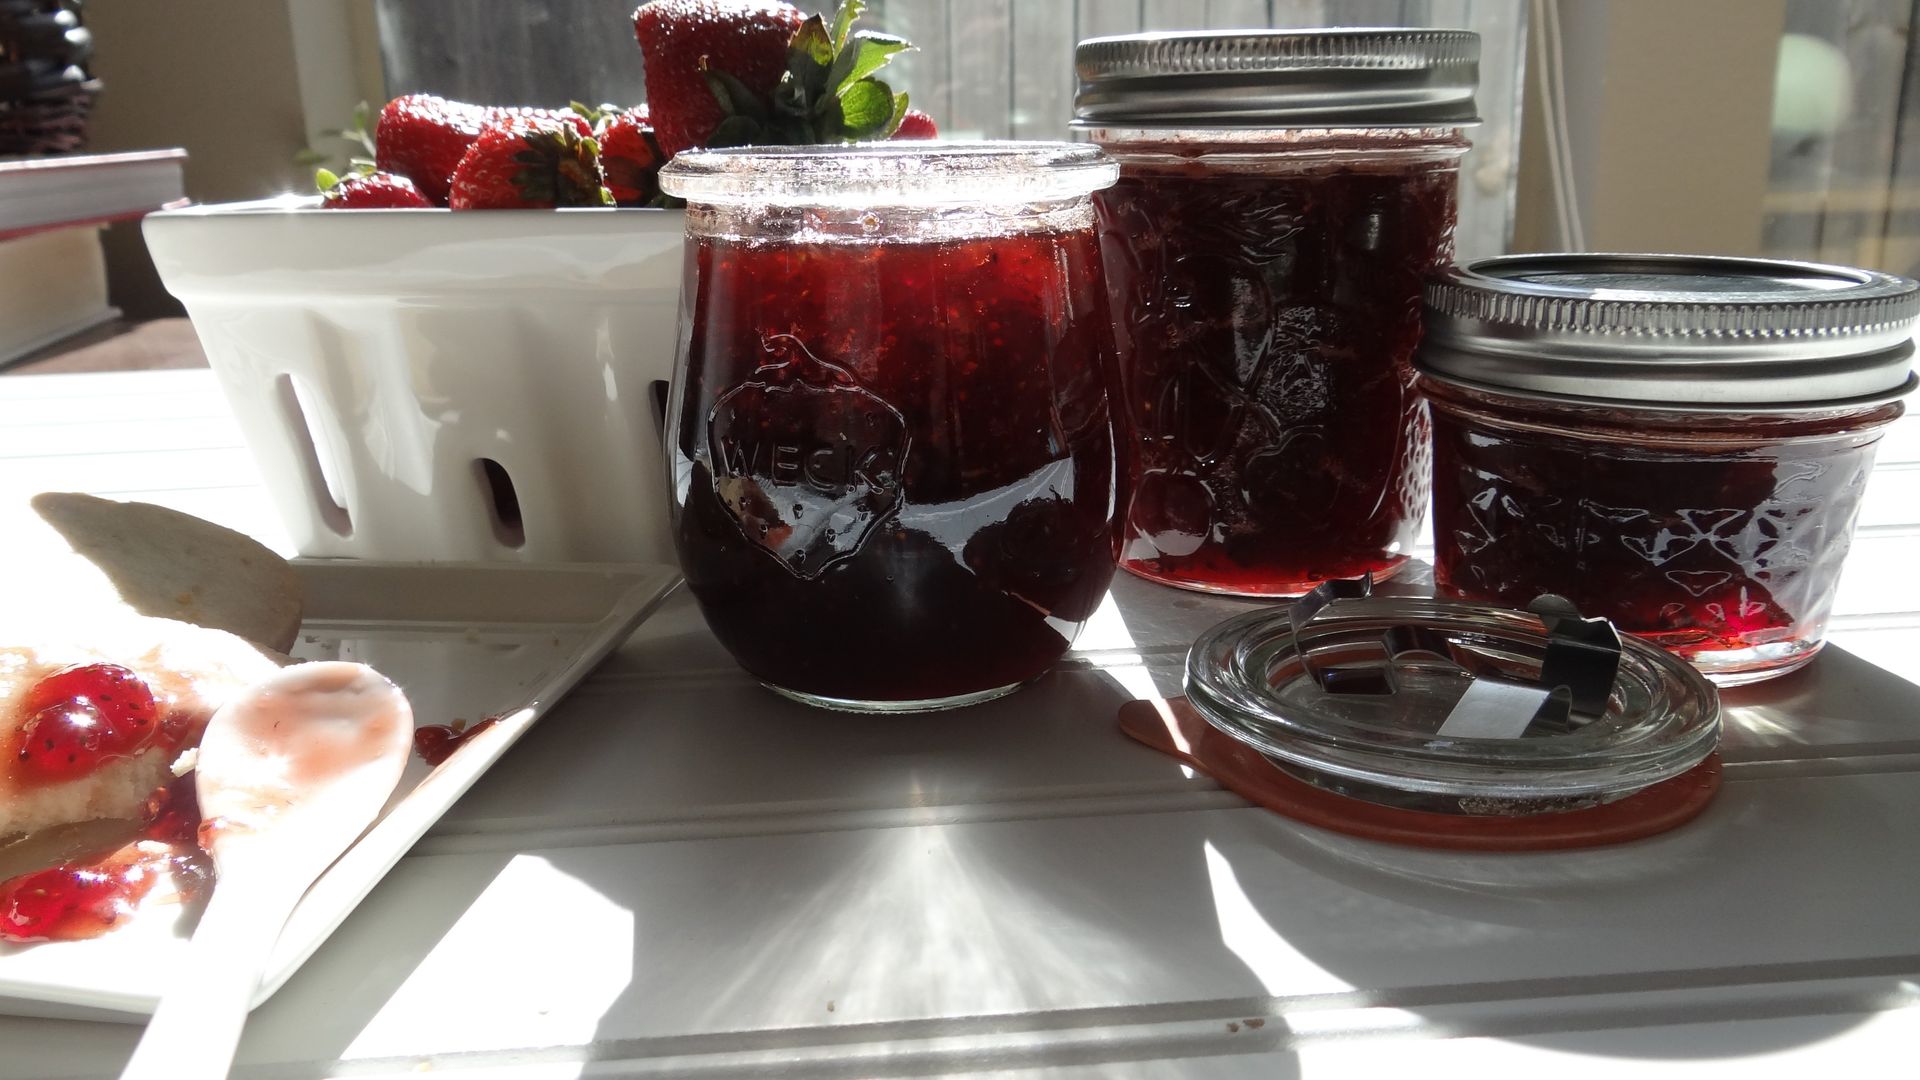
Strawberries are looking good in the local markets right now. Big juicy berries are wonderful on their own but I can’t help but want to cook up a batch of strawberry jam. Prices are currently pretty good, as well, so I was able to purchase two pounds for not much more than one pound has cost lately. And when the cherries get a little sweeter, I’ll use this same method with pitted Bing cherries. In fact, this recipe will adapt easily to stone fruits, such as apricots, peaches and plums. And maybe you’ll have a tomato plant or two that will produce more than you can eat at once. If you haven’t tried tomato jam, it’s a real treat on bruschetta or biscuits. This particular recipe can be made without pectin to thicken it. And with three simple ingredients, it’s a snap to make. You’ll have fresh, homemade jam within an hour or so. It’s perfect to spread on toast for breakfast, or shortbread biscuits for dessert. Enjoy food made fresh! Strawberry Jam 2 pounds strawberries 3 cups sugar 2 tablespoons lemon juice Rinse fruit. Remove stems and hull. Rough chop and place in a bowl or rimmed plate. Mash fruit with back of fork tines, pressing down with hands. Pour fruit and juices into saucepan and mix in sugar and lemon juice. Let rest for about 20 minutes. Cook over medium-high heat, stirring occasionally. If fruit mixture begins to stick or boil too violently, turn heat down to medium. Periodically, skim off the light colored foam that forms on top and discard. Cook approximately 20 minutes or until temperature reaches 220 degrees F. In the meantime, place jars and lids (rings and flats) into hot water bath on stovetop for about 10 minutes to sterilize and heat. Pour hot jam mixture into warm, dry jars. Place flats on jars and screw on ring.
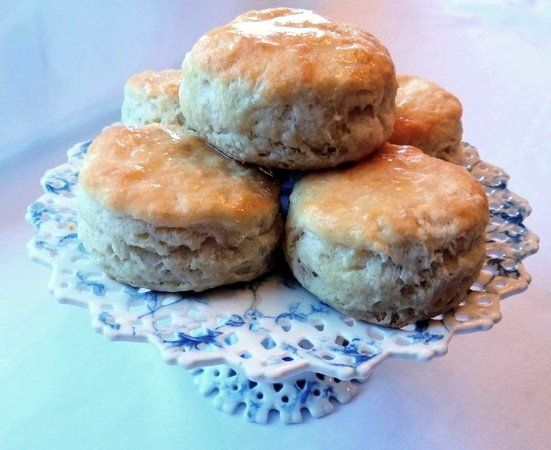
Biscuits were always a staple in our house when I was growing up. My dad seemed to want my mom to be in the kitchen every morning donning an apron with her hair pulled back in a little bun rolling out dough. I guess that was in his dream-world; even though my mom loves to cook, she certainly wasn’t making an appearance like that every morning, especially on a busy workday. But I think he fondly remembered his mother doing it that way and longed for the memories that homemade biscuits conjured up. My mom would indulge his fantasy once in a while when she had time, but typically, she whacked open a can to unleash prepared rounds of dough. They tasted good, and definitely work in a pinch. But when she was really clever, she would tell him we were having square biscuits, as she popped the sliced bread into the toaster. I’ve tried recipe after recipe over the years, always hoping to perfect my own homemade biscuits, but also trying to keep it simple. I wanted the process of making biscuits to be almost as easy as using biscuit mix or running to the store to purchase a can of biscuits. It really doesn’t take much more. I use self-rising flour to eliminate the steps of measuring out baking powder and/or baking soda. And I love the tang you get from a buttermilk biscuit but often don’t have buttermilk on hand. So to cut out the part of the process where I hopped in the car and drove down to the store to get it, I started using the sour-milk method of adding vinegar to regular milk or “sweet” milk, as my dad always called it. And at times, I don’t even use a biscuit cutter; I simply cut the dough into 2 1/2 inch squares with a knife before baking. They definitely aren’t the same square biscuits we used to have! I’m so grateful for the traditions my mother and my grandmothers have passed on to me, especially the love of being in the kitchen and cooking for our families. Make some memories with homemade biscuits this weekend. Whether you make them on a regular basis, or save it for special occasions, you’ll be a hero to your family as they smell that wonderful aroma coming from the oven! Enjoy food made fresh! Basic Breakfast Biscuits 2 1/2 cups self-rising flour 1 stick, or 1/2 cup unsalted butter, cold 1 cup whole milk 3 tablespoons white vinegar Preheat oven to 400 degrees. Measure 1 cup milk and add 3 tablespoons vinegar then set aside. Place 2 cups self-rising flour into mixing bowl. Begin cutting cold butter cut into very small pieces into the flour. Use pastry cutter or 2 butter knives to blend. Milk will now appear slightly lumpy; stir to combine. Incorporate milk mixture into flour stirring until smooth. Add remaining 1/2 cup flour and continue blending. When well blended, turn dough out onto floured surface. Separate dough into 2 balls. Roll one ball into approximately 6-by-10 inch rectangle. Fold dough in half and roll again to same size. Cut out biscuits with 2 1/2 inch biscuit cutter or glass. Place on baking sheet. Combine scraps with the other dough ball and repeat process. Bake at 400 degrees for approximately 15 minutes. Remove from oven and brush tops with additional butter. Makes 12 biscuits. Tip: Freeze butter then grate into the flour using a box grater. This will help to incorporate the cold butter into the flour in small enough pieces that the end result will be an even texture throughout the biscuit, but the cold butter will still leave little pockets of air creating a fluffy biscuit.
Main Dishes and Soups

Just in time for your 4th of July celebration! Add a personal, customized touch to a delicious meal with an easy, “made-from-scratch” barbeque sauce. If you have never made it, you will be surprised at just how easy it is. Smoked meats such as briskets and ribs, or grilled chicken, pork chops and sausage links can only be made better with the addition of a fantastic sauce. There are many good bottled barbeque sauces on the market but you just can’t beat stirring up a fabulous sauce of your own. Your friends and family will be so impressed! You may have read the stories I’ve written about “PaPaw Dub’s” homemade barbeque sauce. We first started using the recipe that he created for his award-winning briskets; but since he used to make it by the gallon, we’ve reworked it a little. I add flavors that go with the type of meal we are preparing. This version is infused with smoky chipotle chiles and has become a classic. Use this recipe as is or change up some of the flavors to make your own signature sauce. Cook and prepare meats for serving and apply sauce like a paste, as much or as little as you like. Or serve the sauce on the side. This recipe makes approximately 3 cups. Cut the ingredients in half if you just need a dab, but every time I do that I dance around the kitchen eating it by the spoonful, wishing I made a full batch. Smoky Chipotle Barbeque Sauce 12 ounces tomato paste 1/2 cup water 1/2 cup cola (regular, not diet) 1/4 cup white vinegar 1/2 cup light corn syrup 1/2 cup dark brown sugar 2 to 3 tablespoons chipotle chiles in adobo sauce, finely minced 2 tablespoons freshly squeezed orange juice 2 tablespoons Worcestershire sauce 2 tablespoons soy sauce 2 teaspoons salt 2 teaspoons freshly ground black pepper 1 teaspoon freshly grated ginger root 1/2 teaspoon onion powder 1/2 teaspoon garlic powder Whisk together all ingredients in a medium saucepan. Cook over medium heat until mixture comes to a slight boil. Reduce heat and to low and simmer for 20 minutes, stirring often. Remove from heat and cover with lid until cool. Mixture will thicken as it cools. Refrigerate in airtight container until ready to use. Reheat as needed. TIP: When you purchase a can of chipotle chiles in adobo sauce and only intend to use a little, whop them in the blender for a couple of good turns. Spoon the mixture into an ice cube tray. Freeze, then pop out frozen chile cubes and place in a zip-top freezer bag. Take out one cube at a time to add to sauces and other recipes as needed. A standard ice cube will be about 2 tablespoons.
I've never met a dumpling I didn’t like. But I still remember my first attempt at chicken and dumplings as a young bride wasn’t too great. I put pieces of chicken, pre-cut from the store, in a pot of plain water and boiled it for a long time. I probably added some salt and pepper, but that was about it. When the chicken was done I didn’t debone it, I left it in the pot, skin and all. I then whacked open a can of biscuits and plopped them in with the chicken and cooked them until they turned into big puffy hunks of bread. I was quite proud. My “Mr.” had quite a shock! It turns out there are other ways of making chicken and dumplings that I had never heard of. His mom took the chicken off the bone and rolled out little thin noodle-type dumplings she made from scratch. This was all news to me. Later on, I would learn the other ways of the world (and of my grandmother), but I still love the biscuit dumplings, and so do my kids; my daughter recently asked me for the recipe. I said, “Honey, those just come out of a can.” She said, “I know, but I need to know just how you do it.” I explained that I pull each piece of biscuit dough into 4 parts, and I’m careful not to cook them too long in the boiling broth; when they rise to the top of the liquid they are just about done. I’m much more experienced now with canned dough, as if it would take experience! And, oh yes, I do debone the chicken now-a-days. I’ve also tried another quick version that one of my grandmothers taught me. She said to cut prepared flour tortillas into strips and drop them into simmering broth. The first time I tried it I made the mistake of stirring the pot and they broke up and turned to mush. The next time I resisted stirring and they turned out a little better. Although I love eating the easy dumplings, I’d rather be known for making the “made-from-scratch” kind. Maybe someday I will do justice to this heirloom, scratch recipe belonging to my grandmother. Grandma Lowe was inventive and fun in the kitchen. She was creative and thrifty and made everything taste good – even stale saltine crackers she would re-toast in the oven. She made delicious bread pudding and delectable peanut patties. And thank goodness I learned about her dumplings. I do aspire to be like this sweet, talented lady. Enjoy food made fresh! Grandma Lowe’s Dumplings 2 cups flour 2 teaspoons baking powder 1 teaspoon salt 3 tablespoons shorting Enough milk to make a soft dough Mix dry ingredients well and then cut in the shortening. Gradually add milk a little at a time until you form a soft ball, not too sticky. Drop by rounded tablespoons into a pot of simmering chicken broth and cook 15 to 20 minutes on medium heat. Keep covered. Makes 6 servings.
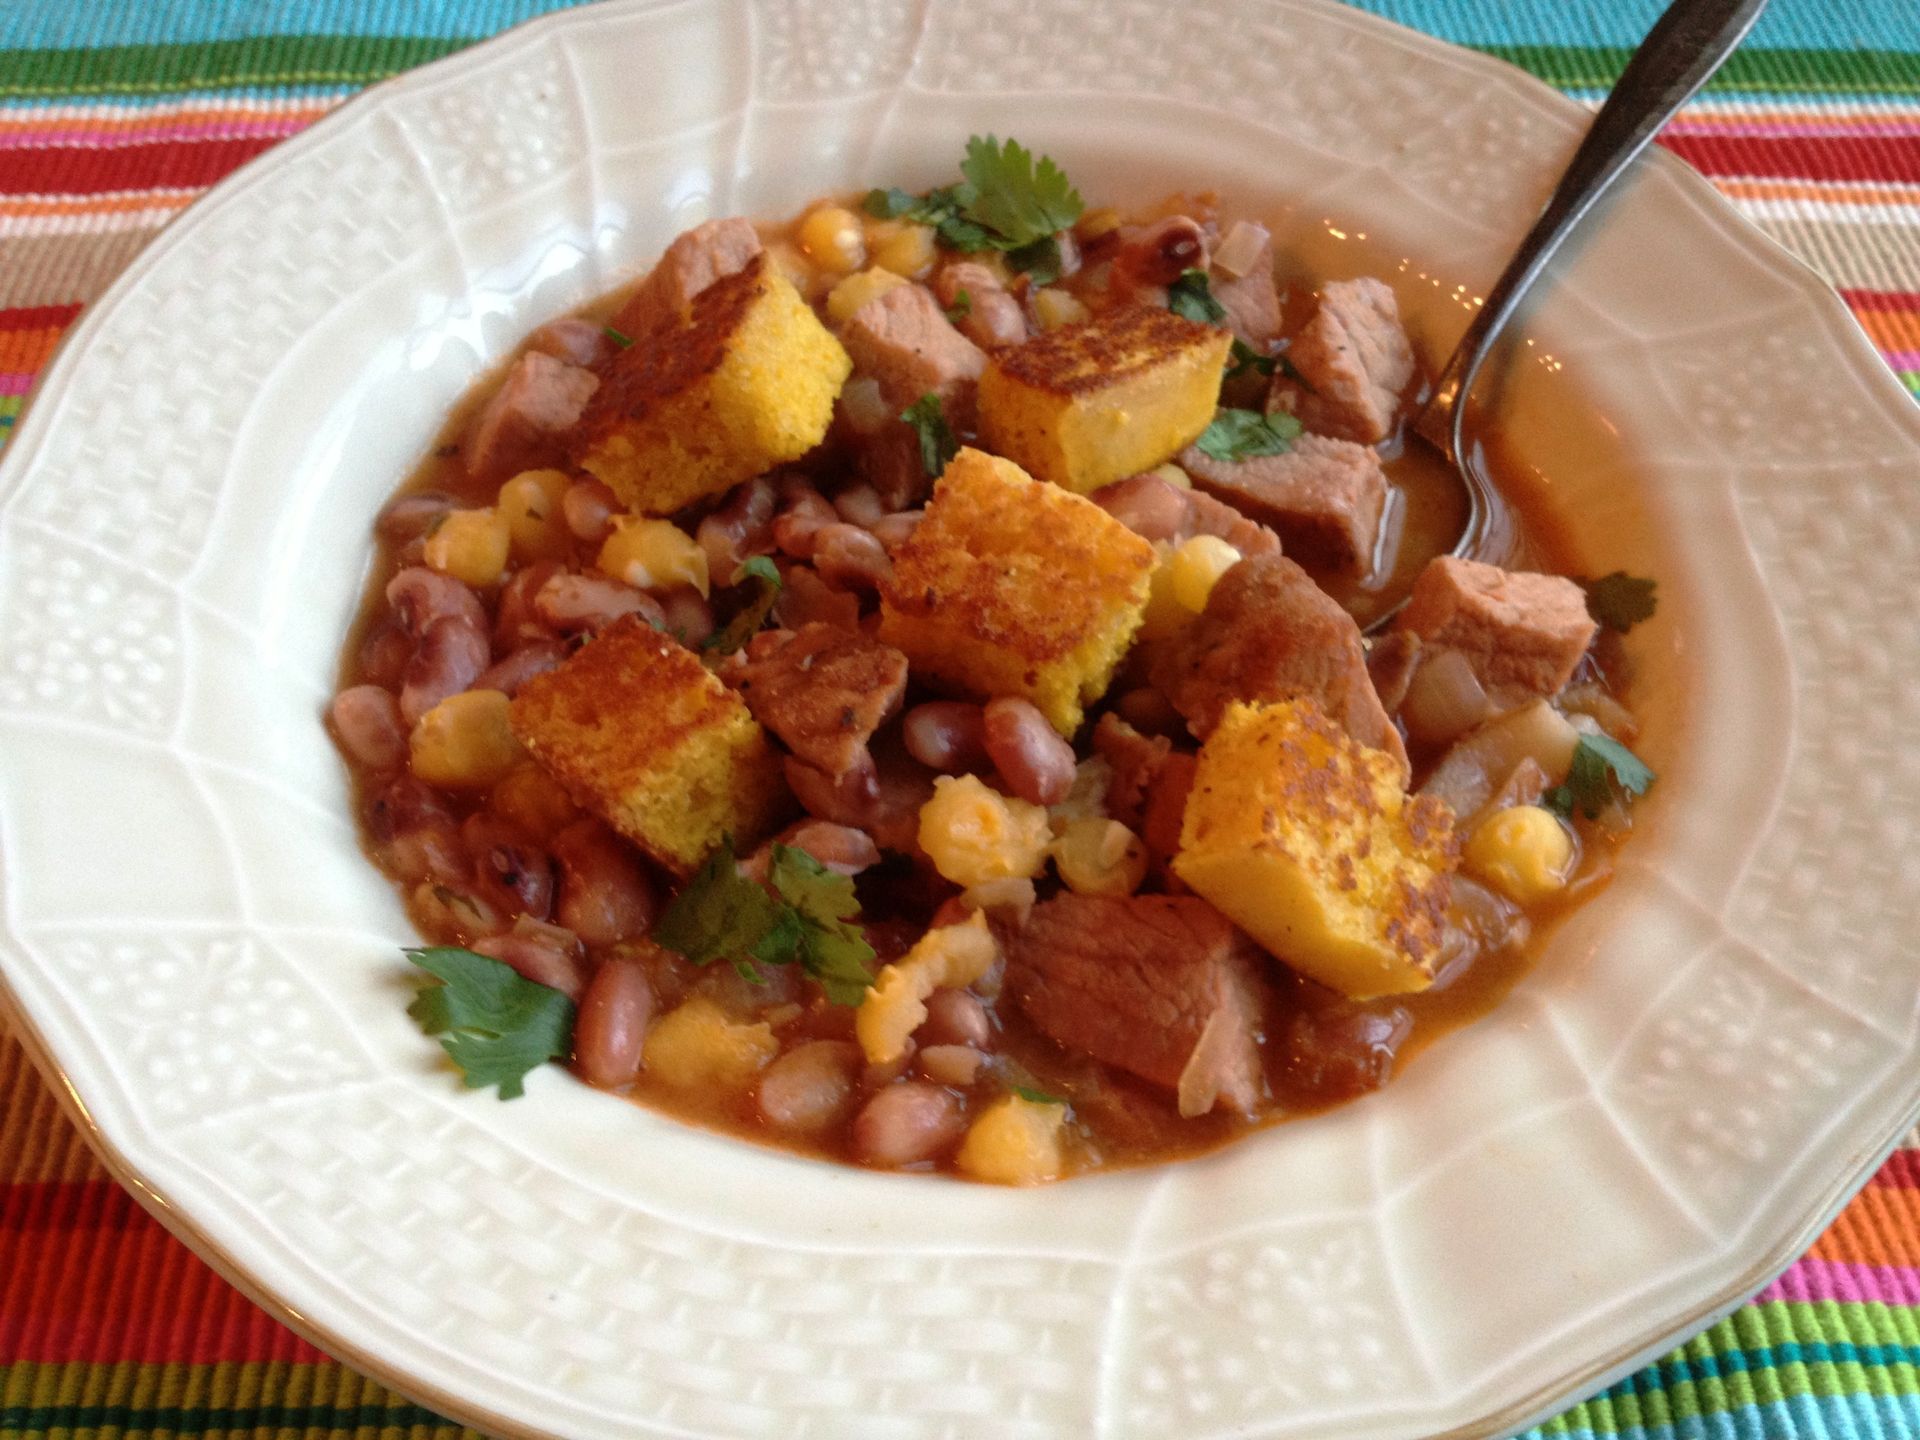
The appeal of fall is all around us - pumpkins, hot chocolate and football games, Frito Pie, cool mornings, early evenings. The first burst of warmth in the spring feels so good but what I really love is that same feeling of warmth in the fall. The cool air comes in and feels nice, but the left over warmth of summer fights hard to stay in place; it seems like the warm air battles to shine brighter than the cool air. That feeling is unmatched. But when warmth does give way to cool, it’s time to start thinking of soups and stews simmering in the kitchen. We often look to this kind of soul warming one-pot meals during fall and winter. How ‘bout a big, warm bowl of Tex-Mex Cassoulet? It may sound like a contradiction of terms – Tex-Mex and French Cassoulet, (Julia Child would probably want to give me a spanking). But hey – we make posole in the Southwestern part of the US, which is a thick Mexican soup made with hominy and pork. Cassoulet originated in the Southwestern region of France and is a bean stew or casserole often containing pork. ‘Sounds like a great marriage to me. And forgive me, but we really put the pig to work in this one with cubed pork chops and bacon! But I think you’ll like the union of flavors. Now if you have anyone in your household that refuses to eat hominy, substitute it with 1 ½ cups frozen corn, or 1 to 2 diced potatoes. Enjoy food made fresh! Tex-Mex Cassoulet 1 cup dried Pinto or Anasazi beans, sorted and rinsed 6 slices thick-cut bacon, cut into small pieces4 boneless, center-cut pork chops, cubed 1/3 cup flour 1 medium onion, diced 1 teaspoon salt 4 cloves garlic, minced 2 tablespoons fresh cilantro, chopped - divided 1/4 cup tomato paste 2 tablespoons chipotle pepper paste* 1 teaspoon cumin 5 cups chicken broth 1 cup dry white wine 1 - 15 ounce can of hominy, drained Cornbread croutons** Rinse beans and place in bowl; cover with water and soak overnight or about 8 hours. Drain water from beans and set aside. Heat Dutch oven over medium-high heat and begin to brown bacon pieces. Toss pork chop cubes in flour. Add cubed pork to bacon pieces and continue browning. Add onions and salt and cook until onions are tender, about 5 minutes. Next add beans, garlic, 1 tablespoon cilantro, tomato paste, chipotle paste, cumin and chicken broth. Bring to a boil, cover, and reduce heat to medium-low and simmer for 1 hour or until beans are tender. Stir in wine and hominy and place Dutch oven in preheated 350 degree oven for 1 hour and 15 minutes. Top with remaining cilantro and cornbread croutons before serving. Makes 8 servings. *I make chipotle paste by smashing diced chipotle peppers with a fork and some of the adobo sauce they are canned in. Chopped peppers work fine but I like the chipotle flavor without biting into a piece of the hot pepper **Cut cornbread into small cubes and toast in skillet over medium heat with a tablespoon of melted butter. Toss to coat all sides with butter, and brown for 3 or 4 minutes
Sides and Salads

One may ponder why so many Americans celebrate the anniversary of Mexican troops defeating the French Army at the Battle Puebla in 1862. Every year, the event is commemorated by Mexicans and Americans, alike. The news of the Mexican victory was celebrated immediately in the U.S., and for every year on May 5th during the American Civil War, and therefore became an American tradition. I don’t really need a reason to celebrate to cook up a big Tex-Mex meal. But with Cinco de Mayo in mind, this light and colorful salad will go perfectly with barbeque or your favorite tacos, enchiladas, or tostadas and might just make you want to hoot and holler and take a swing at a piñata! This quick and easy recipe will leave you plenty of time for celebrating. Enjoy food made fresh! Fresh Fiesta Salad 3 ears of fresh corn, cleaned 1 medium-size, or 2 small zucchinis, chopped into 1/2 inch cubes 4 green onions, thinly sliced 1 red bell pepper, diced 1 fresh jalapeno, seeded and finely diced 3 tablespoons olive oil 1 1/2 cups grape tomatoes, cut into halves 2 tablespoons fresh cilantro, chopped 1/2 cup queso fresco, crumbled Salt and pepper to taste Blanch ears of corn by placing them in a pot of boiling water over medium heat for 2 minutes. Remove from water and let cool. Cut corn kernels from cob and set aside. Heat oil in large skillet over medium heat. Add corn, zucchini, onions, bell pepper, and jalapeno. Sauté until tender, about 4 minutes. Add desired salt and pepper. Remove from heat and toss with tomatoes, cilantro, and queso fresco. Serves 6.
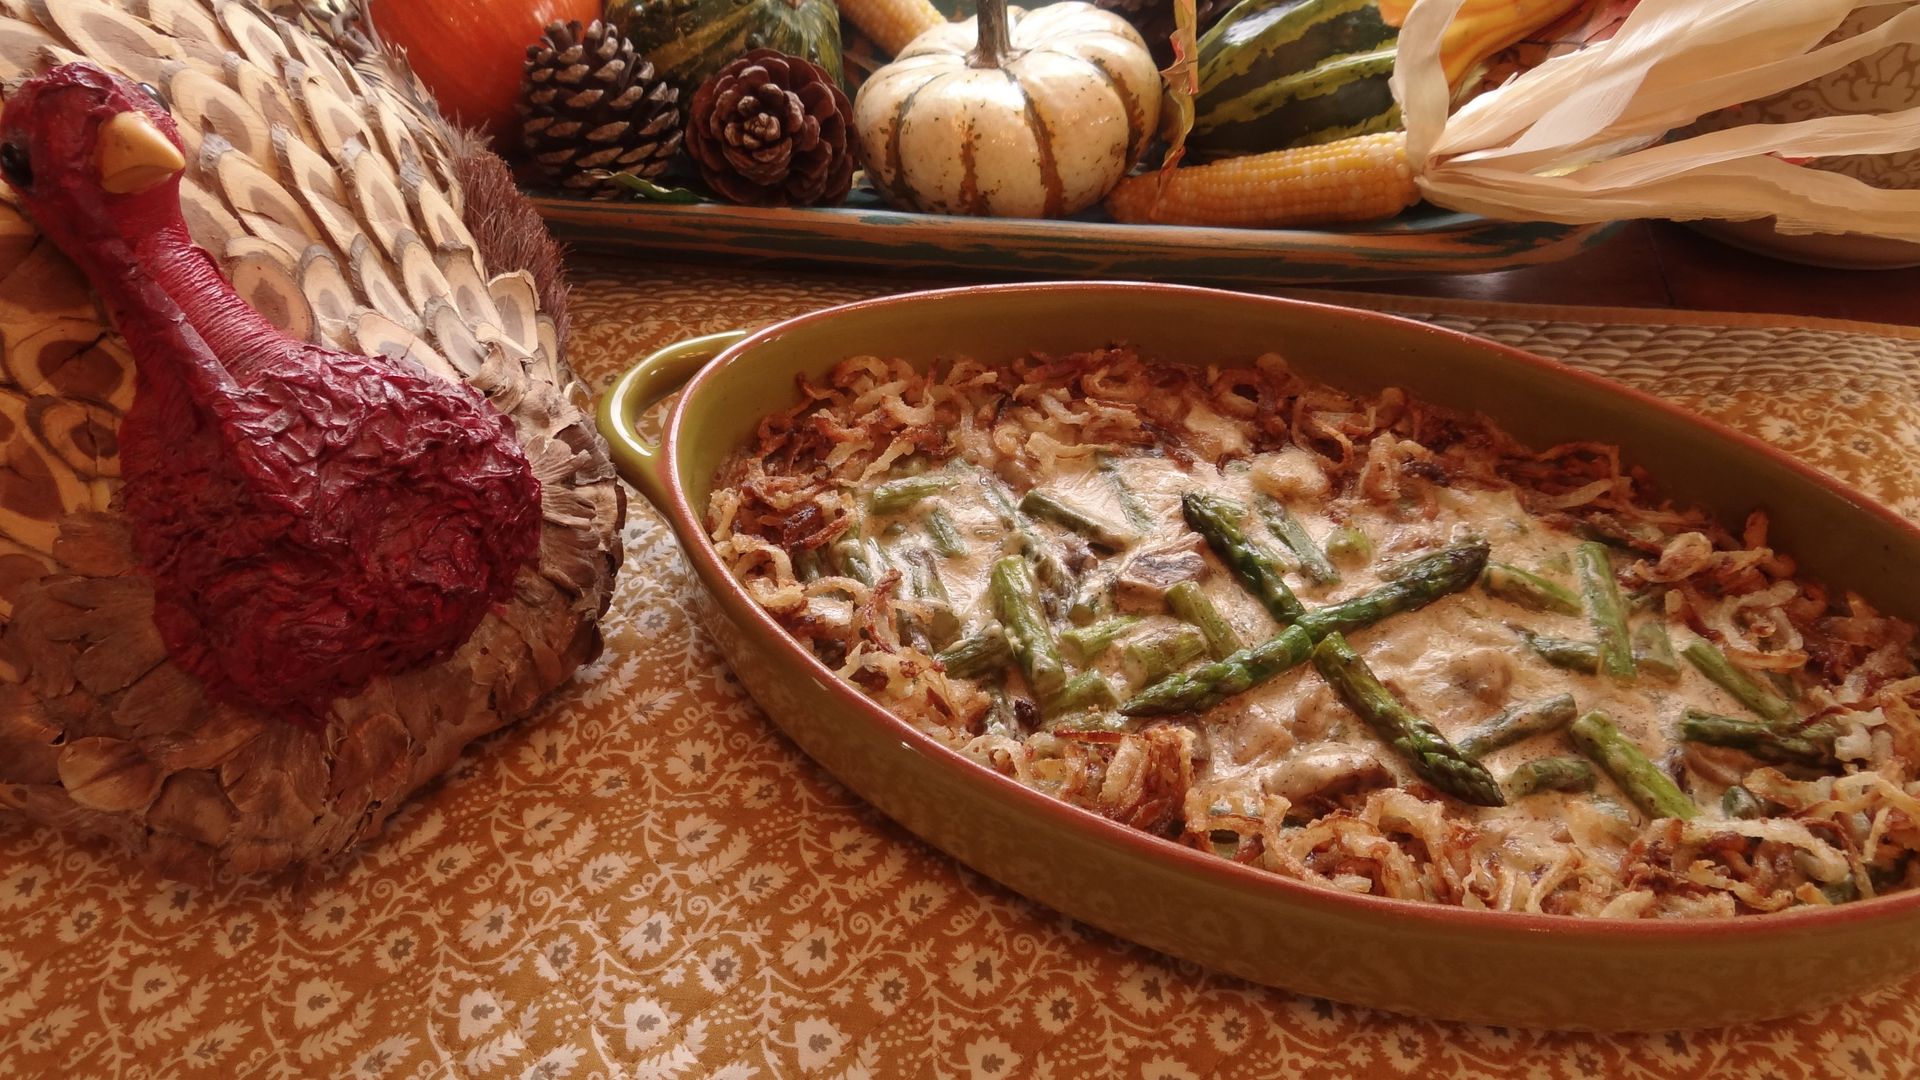
Have you started to make your shopping list for Thanksgiving? This year, I’m adding asparagus to my list. Every year, I assure my family we will have the traditional dishes they all love and associate with the holiday but I will also make at least one offering that’s trendy or has a little twist to it. As you know, I love the challenge of making a dish with the freshest ingredients. A few years ago, my daughter took the idea of the traditional green bean casserole and broke it down into the very best ingredients. She made a home-made cream of mushroom gravy and used fresh green beans. I’m doing a take on that this year but I will be using asparagus in place of green beans. Do you make stuffing or dressing? And do you use primarily cornbread, or mostly cubes of white bread? My family tends to lean toward the southern traditional with cornbread. I don’t get a lot of wiggle room when it comes to dressing; they are pretty consistent about that. But hopefully they will be open to asparagus this year! If your family bulks at the idea, this recipe can be easily adapted to make a nice, fresh green bean casserole, if you prefer. Enjoy food made fresh! Fresh Asparagus Casserole 6 tablespoons butter, divided 2 1/4 pound fresh asparagus 1/2 pound button mushrooms 1/3 cup plus 3 tablespoons flour, divided 1/2 cups half & half Salt and pepper to taste Pinch of nutmeg 1 onion, very thinly sliced 3 tablespoons vegetable oil Rinse asparagus. Bend each stalk to snap off tough end; it will naturally bend I the right spot. Cut the good part into thirds, about 1 ½ inches long. Brush mushrooms with damp paper towel to remove any loose dirt. Cut mushrooms into cubes. Melt 3 tablespoons butter over medium heat in large skillet. Add asparagus and mushrooms. Sprinkle with a little salt and pepper to taste. Cook, stirring occasionally, for 10 minutes until partly tender. Remove with slotted spoon and place in bowl; set aside. In same skillet, add the other 3 tablespoons butter cooking over medium heat. Once melted, add 3 tablespoons flour, stirring for a minute or two until flour turns light brown. Season with a pinch of salt and pepper. Whisk in half & half. Continue whisking for a minute or two until it begins to thicken. Stir in a pinch of freshly grated nutmeg, or ground nutmeg. Add vegetables back to pan and stir to coat (same 3 or 4 pretty asparagus tips to garnish the top of the casserole). Pour mixture into buttered backing dish. Cover with foil and bake in preheated 350 degree oven for 30 minutes. Toss thinly sliced onions in remaining 1/3 cup flour. Heat vegetable oil in large skillet over medium heat. Once oil sizzles when small piece of onion is added, add remaining onions and cook, stirring often until light brown and crunchy. If you let one of them turn black, don’t worry, just pick that one out – I’m sure Durkees burns one once in a while. Remove with slotted spoon and drain on paper towel lined plate. Sprinkle with a pinch of salt. Remove casserole from oven after 30 minutes and top with crunchy onions. Return to oven without foil for 5 minutes. Serves 8.
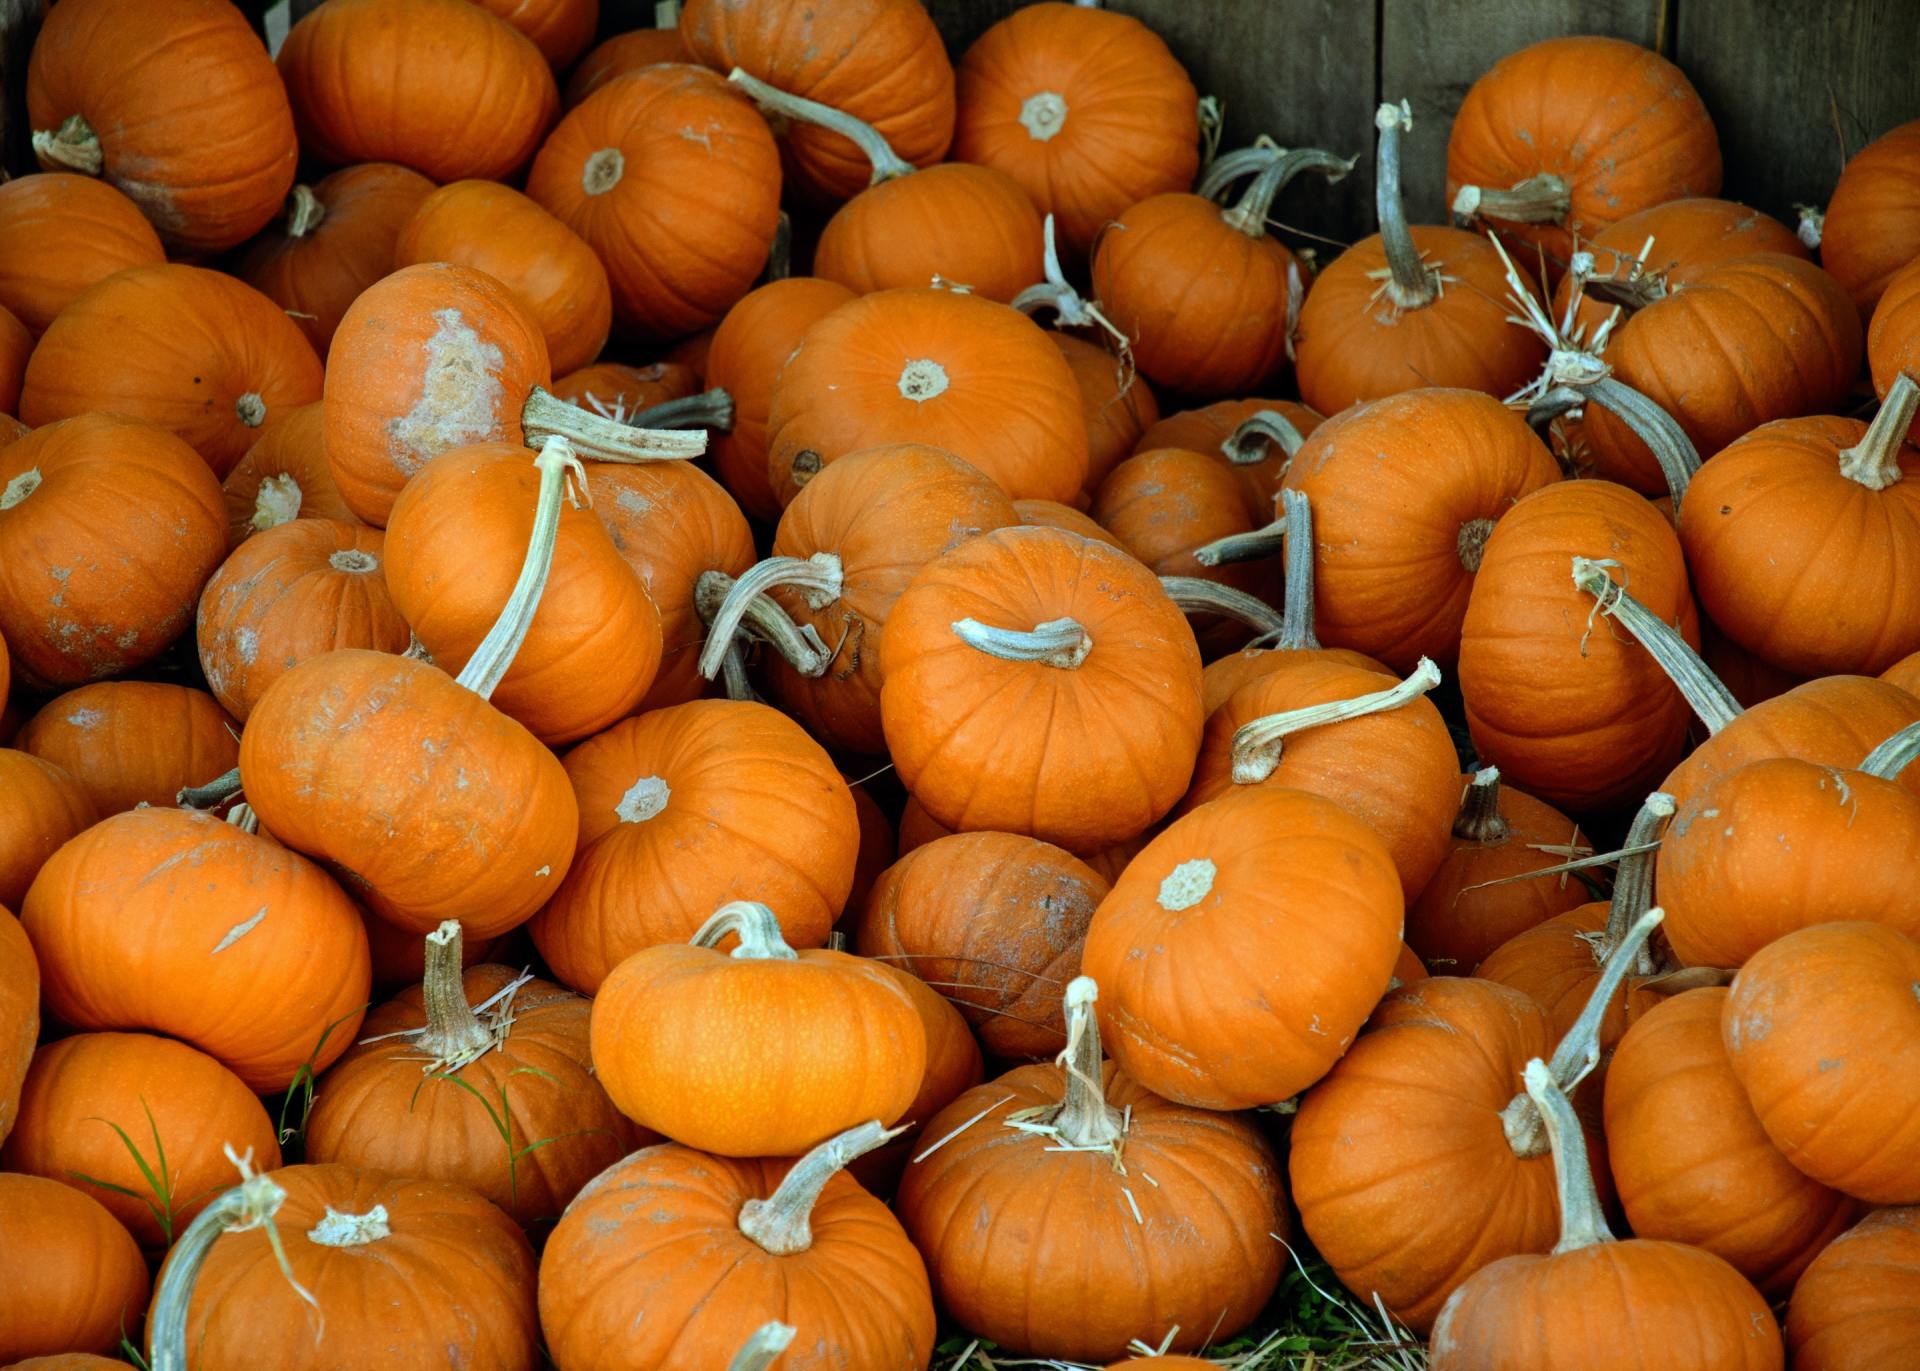
I was always a little intimidated about cutting into a pie pumpkin. And let’s face it - even though I promote the use of fresh ingredients, there are several canned and frozen products I like to keep on hand. Canned pumpkin is one of them. But quite a few years ago, my grandmother took the mystery out of baking with fresh pumpkin for me. While pumpkins are readily available why not try this easy process for preparing pie pumpkins; they have a great fresh color and taste. I've been noticing great prices on pie pumpkins this week so this is an opportune time to prepare them and freeze until you're ready to make your pies, or pumpkin bread, or pumpkin rolls; even put some in the freezer for later in the year. I also clean and salt the seeds, then toast them on a buttered cookie sheet at 250 degrees for about 1 hour, stirring occasionally. Pumpkin seeds are a delicious, healthy snack. And incorporating pumpkin into any dish adds great nutrition. Enjoy food made fresh! Baked Pumpkin 1 2 to 3 pound pumpkin - often referred to as a pie pumpkin 1 tablespoon vegetable oil Carefully cut pumpkin in half from stem to end with sharp knife. Deseed, removing all membrane and strings. Brush cut edges with oil. Place cut-side down on cookie sheet. Bake approximately 45-60 minute in preheated 350 degree oven. The outer skin will be soft and separate easily from the flesh when it is ready. Cool, then scoop out flesh; discard the outer skin. Mash with a fork then use for any pumpkin recipe.
Starters and Snacks
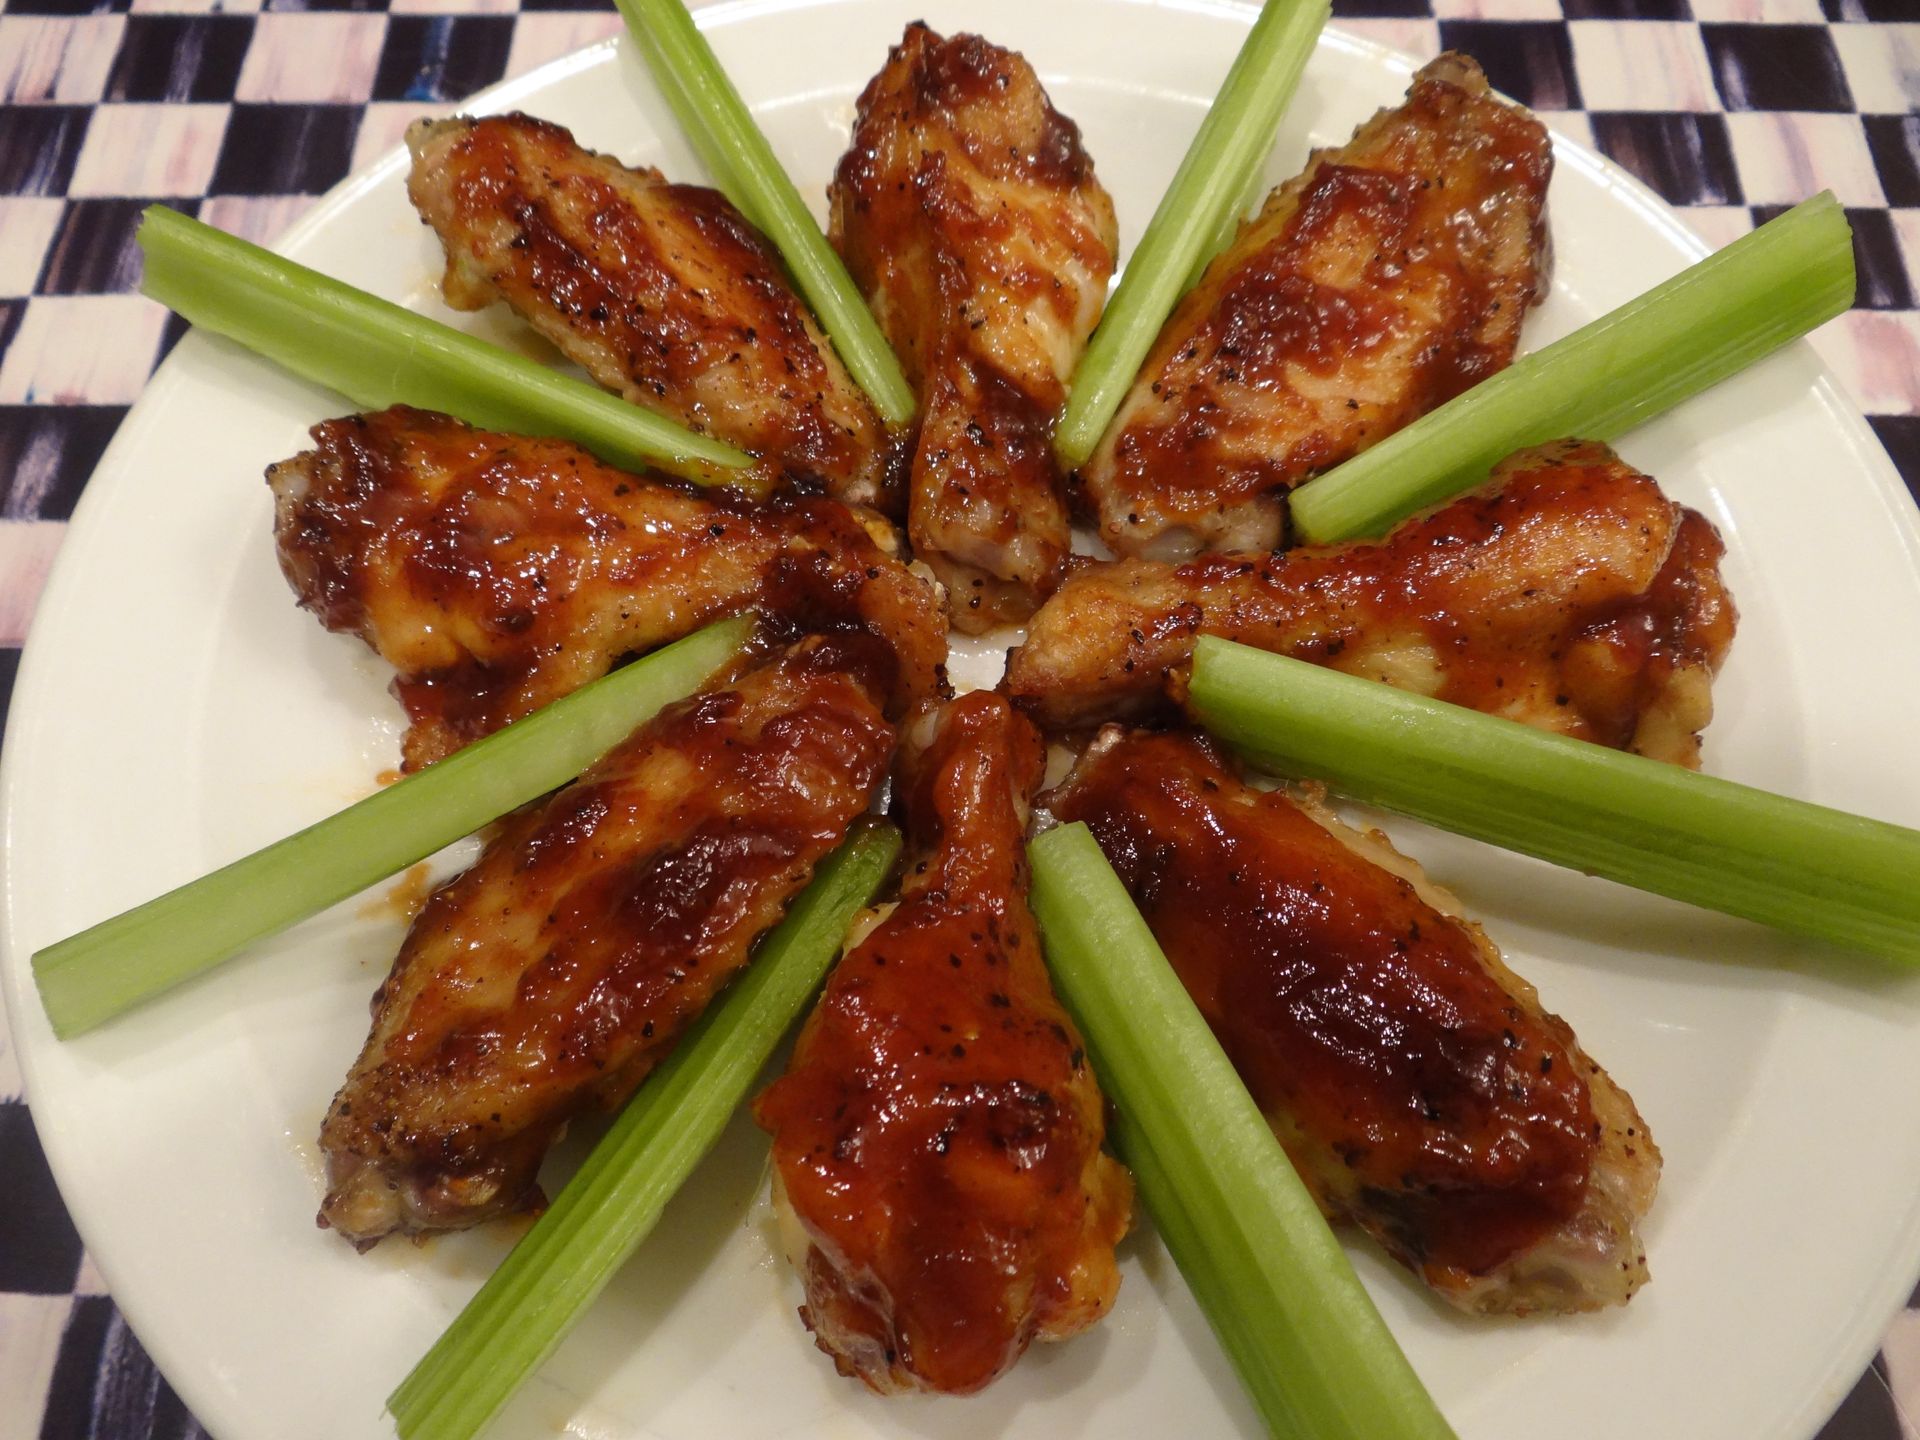
My husband, Mikey (aka Stud Muffin) practically has a language all his own. He puts together bits and pieces of old rhymes, movie quotes, and things his mother used to say to him, and uses them in everyday conversation. It’s one of the cute things I love about him. Then there’s the part of it that I think he just makes up and tries to convince me that it’s for real. For instance – anytime he refers to eating chicken, he calls it “pimp”. (I know……this is getting weird, but just stay with me.) He says that back in the day, the rooster was referred to as the “barnyard pimp”. I mean, it could make sense, I guess – one male, and all those hens in the barnyard. I still don’t really get it. But here’s the bad thing – I actually catch myself using some of this lingo of his. I’ll be in the grocery store picking out something for dinner and I’ll call him on my mobile phone and say, “Honey, does pimp sound okay to you for dinner tonight?” Well how embarrassing. And just imagine the looks I get from the other shoppers nearby. He even has other names he gives to certain recipes made from pimp. Case in point - his recipe for chicken wings. He calls it Wang Dang Do. It’s a catchy phrase but I don’t think he has an explanation for this one. He just matter-of-factly says, “It is what it is – Wang Dang Do.” It makes me wonder if he had trouble beginning to speak as a child, (just kiddin’ honey, I love you!). Anyhow, Mikey can grill like a pro, make breakfast like a champ, and whip up some fantastic Wang Dang Do! Enjoy food made fresh! Wang Dang Do (aka Chicken Wings) 2 pounds chicken wings/drumettes 1 ½ cups prepared barbeque sauce ½ stick melted butter ¼ cup hot sauce (or not) 2 or 3 dashes Worcestershire sauce Salt and pepper to taste To make wing sauce, combine barbeque sauce, melted butter, hot sauce, and Worcestershire sauce in a bucket (Mikey’s word for bowl/baking dish) and set aside. Rinse chicken pieces and dry with paper towel. Season with salt and pepper. Spread pieces out in a large bucket (large cookie sheet in this case). Roast in preheated 425 degree oven for approximately 20 minutes. Then brush on plenty of sauce and continue cooking for 5 minutes or until juices run clear when chicken is stuck with a fork. If you really want to go wild, place raw chicken in about 1 cup buttermilk and refrigerate for 2 to 3 hours. Remove from buttermilk, season with salt and pepper, roll in flour and deep fry until golden brown and juices run clear. Drain on paper towels and toss in wing sauce.
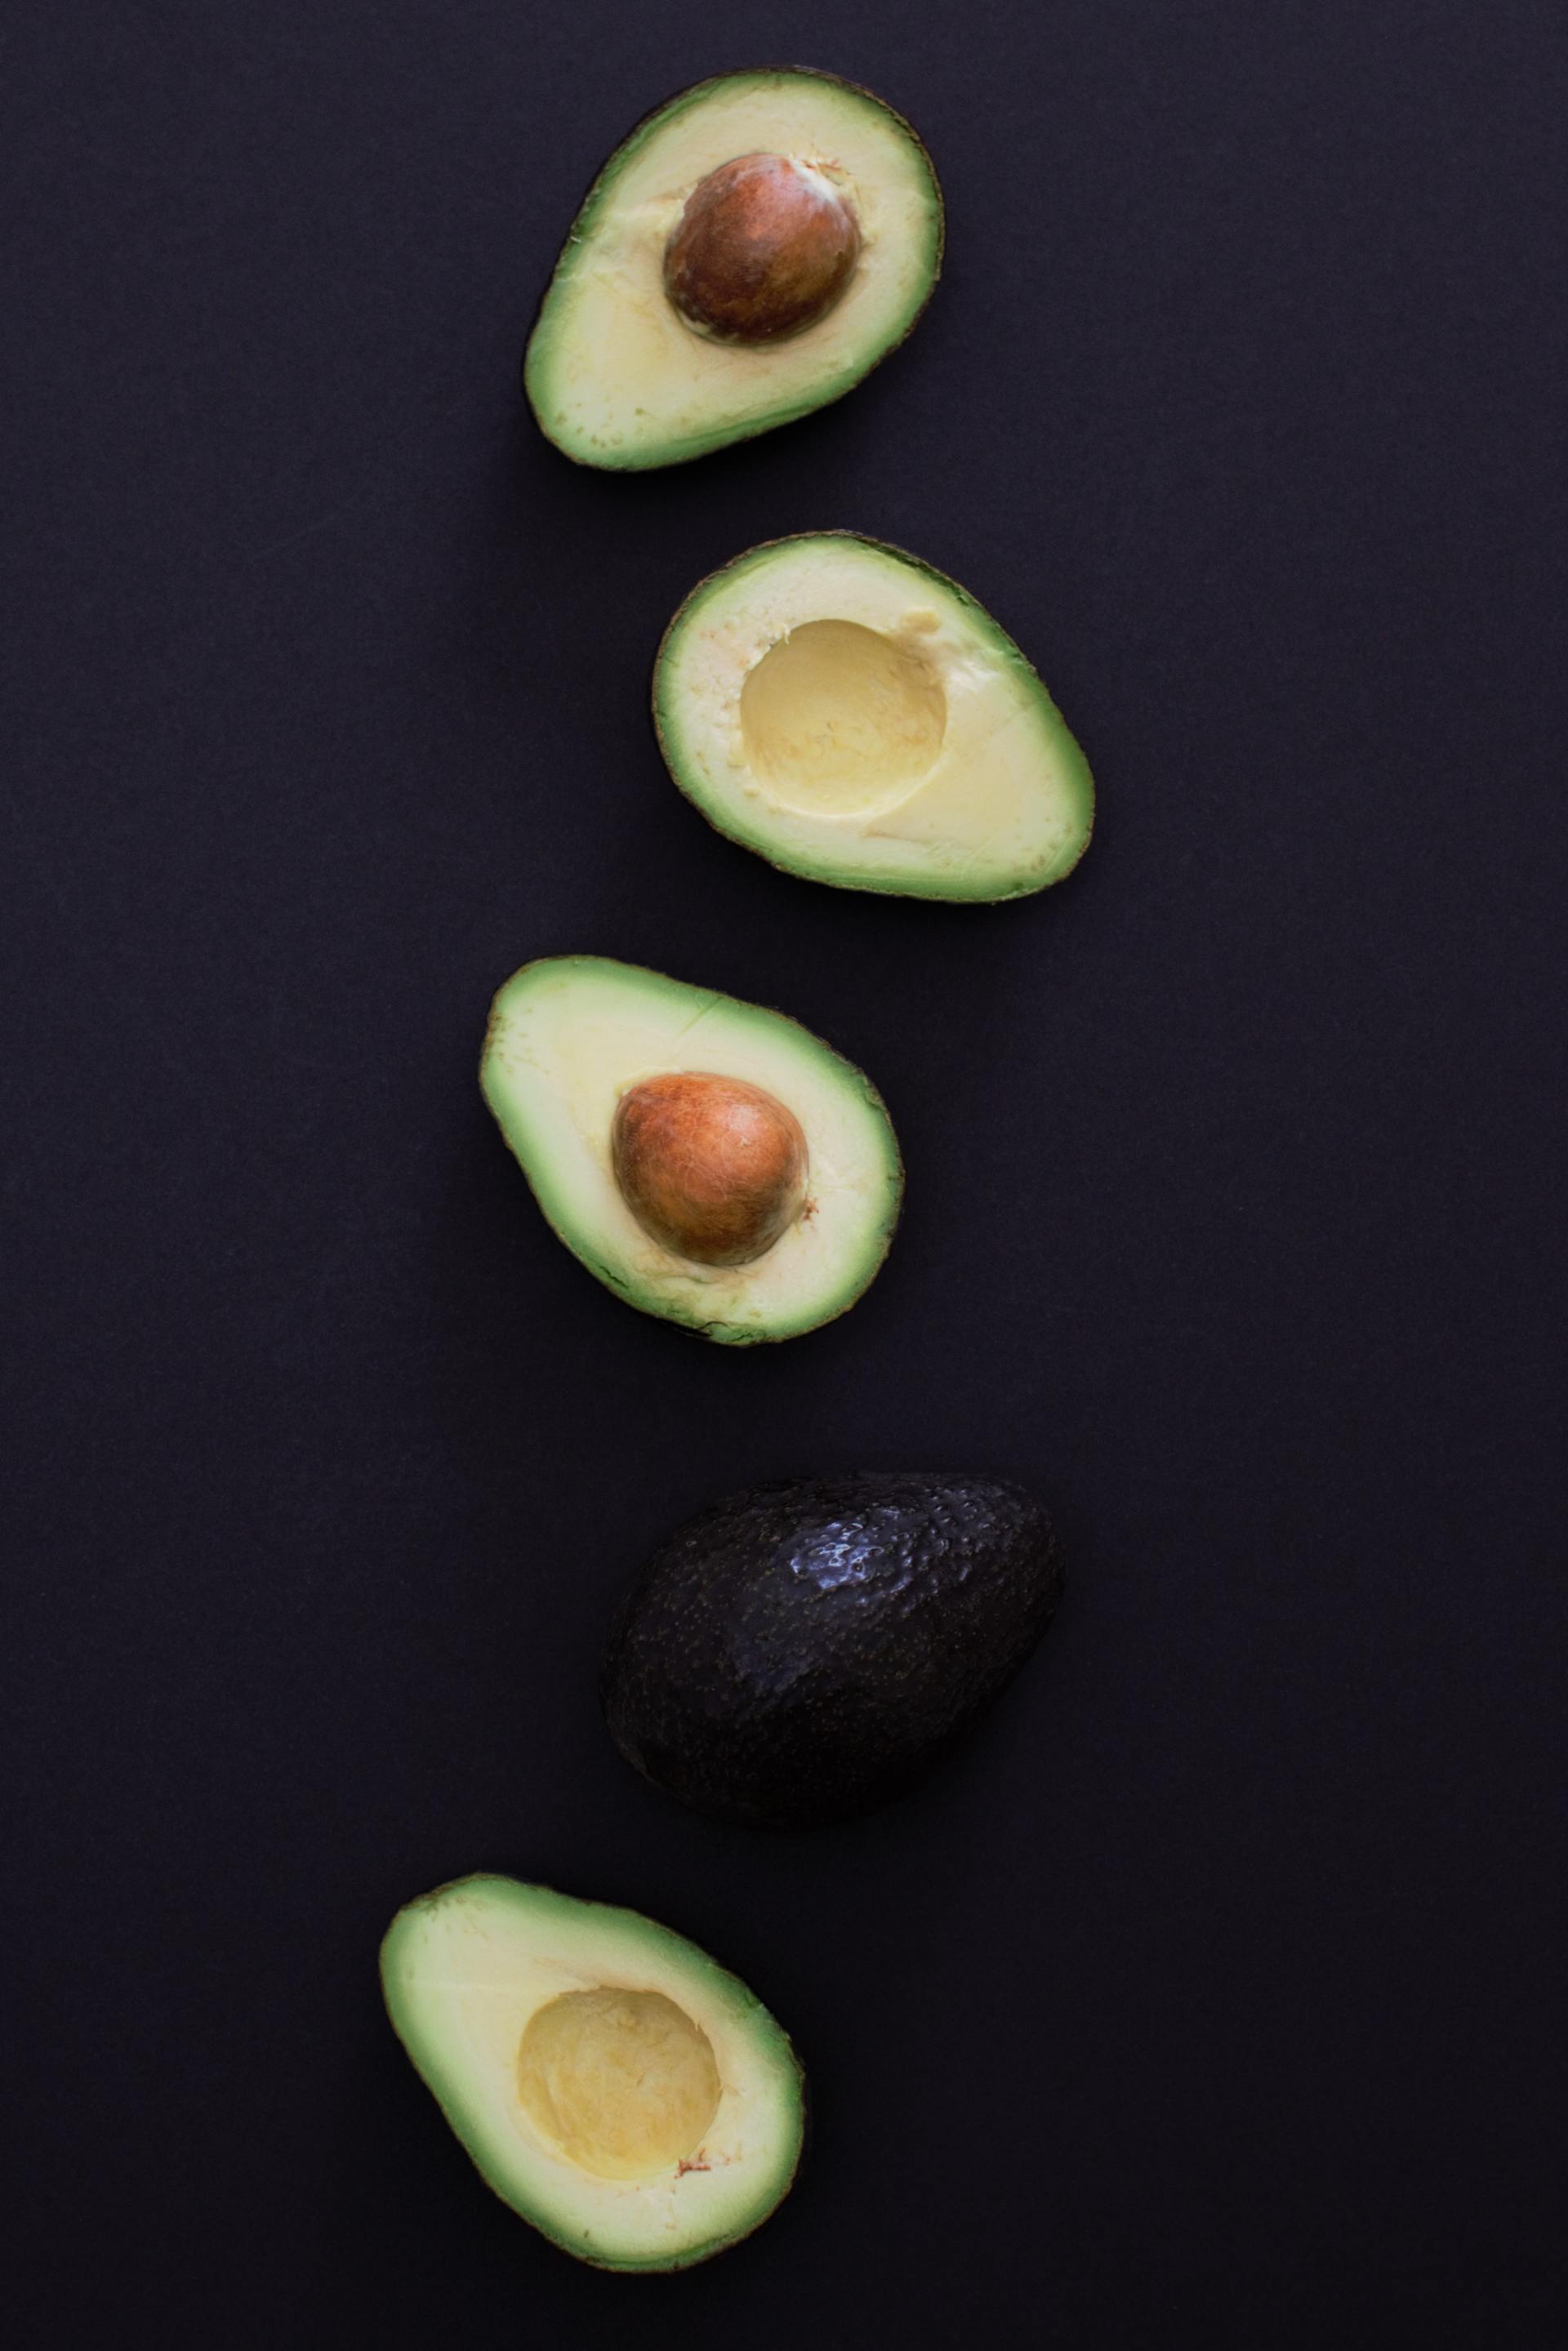
For our barbeque last weekend, I decided to make an avocado salsa that I used to make quite often when I lived in Florida. We often bought “Florida” avocados there which are lighter skinned and do not get quite as soft as the “Haas”. I much prefer the Haas which has more flavor and typically comes from California. Haas is what we see in most of our local produce sections and they were on sale last week so they were a good choice for one of my side dishes for the barbeque. I also use fresh corn in this salsa and if you haven’t bought any yet this year, it is really sweet and priced just right. I like the combination of flavors in this salsa paired with steamed rice or along side a good steak. If you like avocados, I think you will enjoy it, as well. And I can’t say enough about the great nutritional value of the avocado. Enjoy food made fresh! Avocado Salsa 3 medium Haas avocados 1-2 ears fresh corn 1 medium tomato 1/3 cup sweet onion (Vidalia or 1015’s) 3 tablespoons olive oil 3 tablespoons rice vinegar 1 1/2 teaspoons chili powder 1 teaspoons cumin Salt and black pepper Cut avocados in half lengthwise, score cube shapes with knife, scoop out each half with a spoon. After blanching or lightly steaming corn, cut kernels from cob and add to avocado in a small bowl. Fold in diced tomatoes and onion. In a separate bowl whisk together oil, vinegar, and seasoning to make the dressing; drizzle over avocado mixture and gently stir to coat. Makes 4-6 servings.
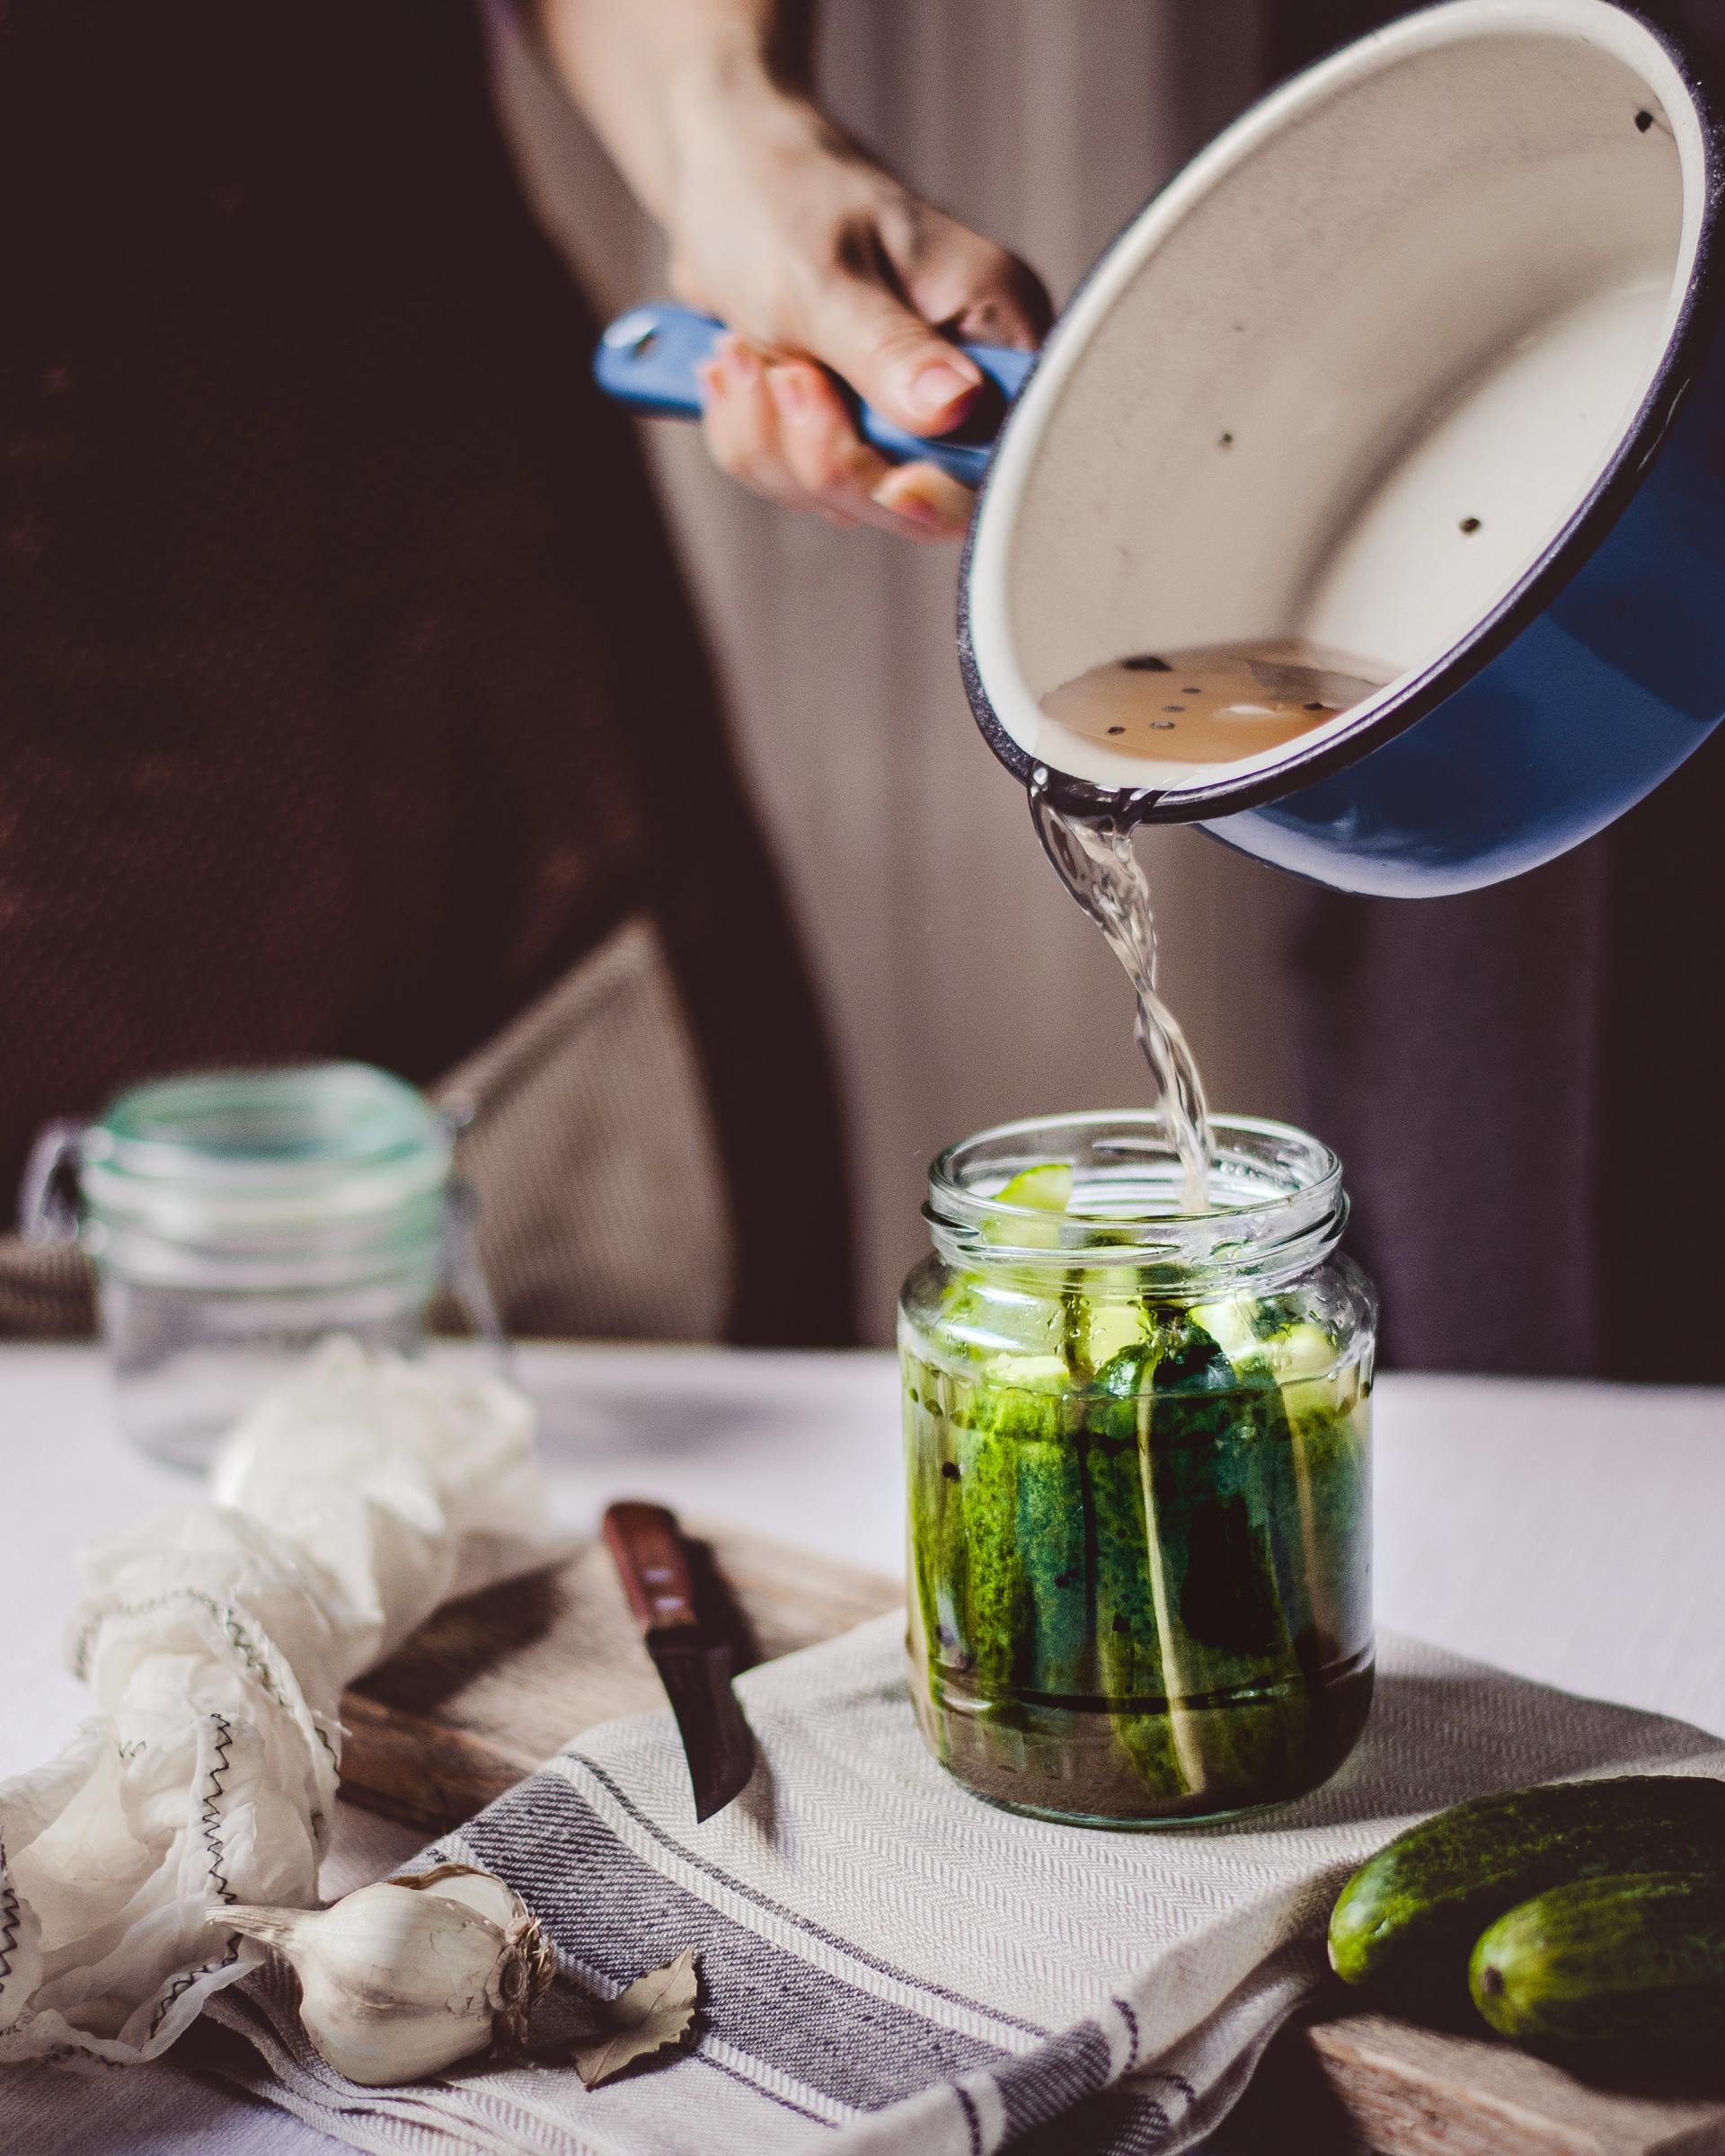
A couple of weeks ago, my Aunt Darlene called and told me she had a half-bushel of black eyed peas with my name on them. I can’t tell you how that thrilled me! My aunt and uncle used to have a fresh produce market for many years. My aunt and her family continue to plant a large garden each spring. I invited my mom and my brother and his family over for Sunday dinner because I know they enjoy black eyed peas as much as I do. The kids helped me shell them, and of course I cooked them with a little bacon for that added pork flavor. Aunt Darlene threw a few “lemon cucumbers” in the bag of fresh peas for me. This is a variety they wanted to try. The outside of the cucumber is pale yellow and about the same size and shape of a lemon. I thought they might have a little bit of a tangy flavor, but the inside looked and tasted like most cucumbers. They were very good. My mom mentioned a good recipe for pickles that she wants to give me and it got me to thinking about this one in the meantime. If you have cucumbers coming in good in your garden, make up several batches of these and share them with your friends. Or, if you like canning but don’t want to get into a big process, or only have a few cucumbers to put up, this is a great method. Leave out the pepper if you just prefer a nice dill flavor without the heat. I’ve been tinkering with the recipe, and this is how I best like it. Enjoy food made fresh! Note: When I can’t get a hold of any pickling cucumbers, I have found 2 pound bags of small cucumbers at Sam’s Club year-round. Refrigerator Spicy Pickles 3 cups white vinegar 2 tablespoons sugar 2 tablespoons plus 2 teaspoons kosher salt 2 teaspoons mustard seeds 1 1/2 teaspoons whole black peppercorns 1 1/2 teaspoons dill seeds 4 cups hot water 2 pounds pickling cucumbers, sliced 1/4-inch thick, skin on 3/4 cup fresh dill, roughly chopped 6 cloves garlic, coarsely chopped 1 teaspoon crushed red pepper flakes, and/or 2 to 3 whole fresh peppers if you prefer Combine vinegar, sugar, salt, mustard seeds, black peppercorns, dill seeds and crushed red pepper flakes in a large bowl. Add hot water and stir until sugar dissolves. Pack cucumbers, dill, garlic, and fresh peppers into airtight containers and completely cover with brine (liquid mixture). Refrigerate overnight; shake or stir once or twice. Store in refrigerator up to two weeks. Makes approximately 1 quart and 1 pint.
Sweets

As we go into a new year, I’ve been reflecting on the hot food subjects of 2013. What were the trends? What will remain popular in 2014 and which new food fads do we have to look forward to this year? Talk about diversity - in 2013, kale gained popularity like never before, as did green smoothies and anything made with pork belly. The Cronut ™, a croissant-doughnut hybrid, was all the rage. And it seems chia seeds are still going to be a great way to supplement a healthy diet in 2014. I can’t wait to see what new food fashions will make an appearance this year! Last May, Chef Dominique Ansel created a big stir with the Cronut ™ craze and hence, the most talked about food subject of the year. Chef Ansel is a classically trained pastry chef and owner of Dominique Ansel Bakery in New York. The doughnut-croissant combination is not to be mistaken for simply being a fried croissant shaped like a doughnut. The chef reportedly prepares only 200 a day, and they sell for $5.00 each. I’ve heard of eager pastry lovers waiting in line as long as five hours at time for a bite of pastry perfection. As you might suspect, the recipe is proprietary and the name has been trademarked. But of course, many have tried to emulate the indulgent novelty, and giving it a try at home is less expensive than plane fare to New York! Although, the time involved is probably about the same as traveling from Texas to New York……and then standing in line for 5 hours, but it was definitely a fun project to try at home. Some of the classic flavor combinations at the now famous bakery have included Rose Vanilla, Apple Crème Fraiche, and Blackberry Lime. I resisted mentioning the Cronut ™ in 2013 because I felt I would be obligated to try making them. It seemed a little daunting and a shame to make dough that resembles croissants only to fry it into a doughnut, as I am more of a savory girl who happens to love croissants. But this project was well worth the time and the Raspberry-Vanilla Bean Cream flavor I went with was quite tasty. Enjoy food made fresh! Croissant-Doughnuts Dough 1 cup warm water 1/4 ounce package dry yeast 1/2 cup milk 1/3 cup sugar 1 1/2 teaspoons salt 1 cup unsalted butter, cubed 2 cups all-purpose flour 2 cups bread flour Extra granulated sugar for dusting Vegetable oil for frying (or grape seed oil which is used at Chef Ansel’s bakery) Dissolve yeast in mixing bowl with warm water. Stir in milk. Add sugar and salt. Place butter and 2 cups of the flour into food processor and pulse a few times. Slowly add remaining 2 cups of flour; mixture will be crumbly. With an electric mixer, slowly add flour mixture to wet mixture until the dough holds together, being careful not to over mix. Turn dough out onto floured surface and knead just until it holds a good shape. Place dough ball into greased bowl and top with plastic wrap. Let rest for 2 hours. Turn dough back out onto floured surface and roll into a 9-by-18 inch rectangle. Fold rectangle into thirds forming a smaller rectangle; give it another roll and then fold into thirds once more. Wrap in plastic wrap and refrigerate overnight. Remove dough from fridge and discard plastic wrap. Roll rectangle out to 9-by-18 inches and cut doughnuts, placing them onto a baking sheet. Let rest for 1 hour. Heat oil to 350 degrees F in heavy-bottom pan over medium heat. Fry each doughnut (and holes) for approximately 1 to 1 1/2 minutes, flipping over halfway through and being careful not to over crowd. Roll in granulated sugar while hot. Vanilla Bean Pastry Cream 3/4 cup sugar 3 cups whole milk 4 egg yolks 1/4 cup cornstarch 1 tablespoon unsalted butter 1 teaspoon vanilla bean paste Combine sugar with 2 3/4 cups milk in medium sauce pan. Bring to boil over medium heat to scald milk. In small mixing bowl, whisk together remaining milk, egg yolks, and cornstarch until smooth. Temper egg yolk mixture by adding a small amount of the warm milk and whisking to bring the temperature up. Gradually add in the remaining warm milk, whisking until combined. Bring mixture to a boil again and cook for about 3 minutes or until mixture is thick, stirring constantly. Remove from heat and stir in butter and vanilla bean paste. With pastry tip and bag, make small holes, inserting pastry cream into 8 or 9 places around the sides of each doughnut. Raspberry Frosting 2 cups powdered sugar 1/4 cup fresh or frozen raspberries, mashed with a fork 2 to 3 tablespoons fresh lemon juice Combine all ingredients, stirring until smooth. Top each doughnut with frosting and serve. Makes approximately 18 doughnuts.
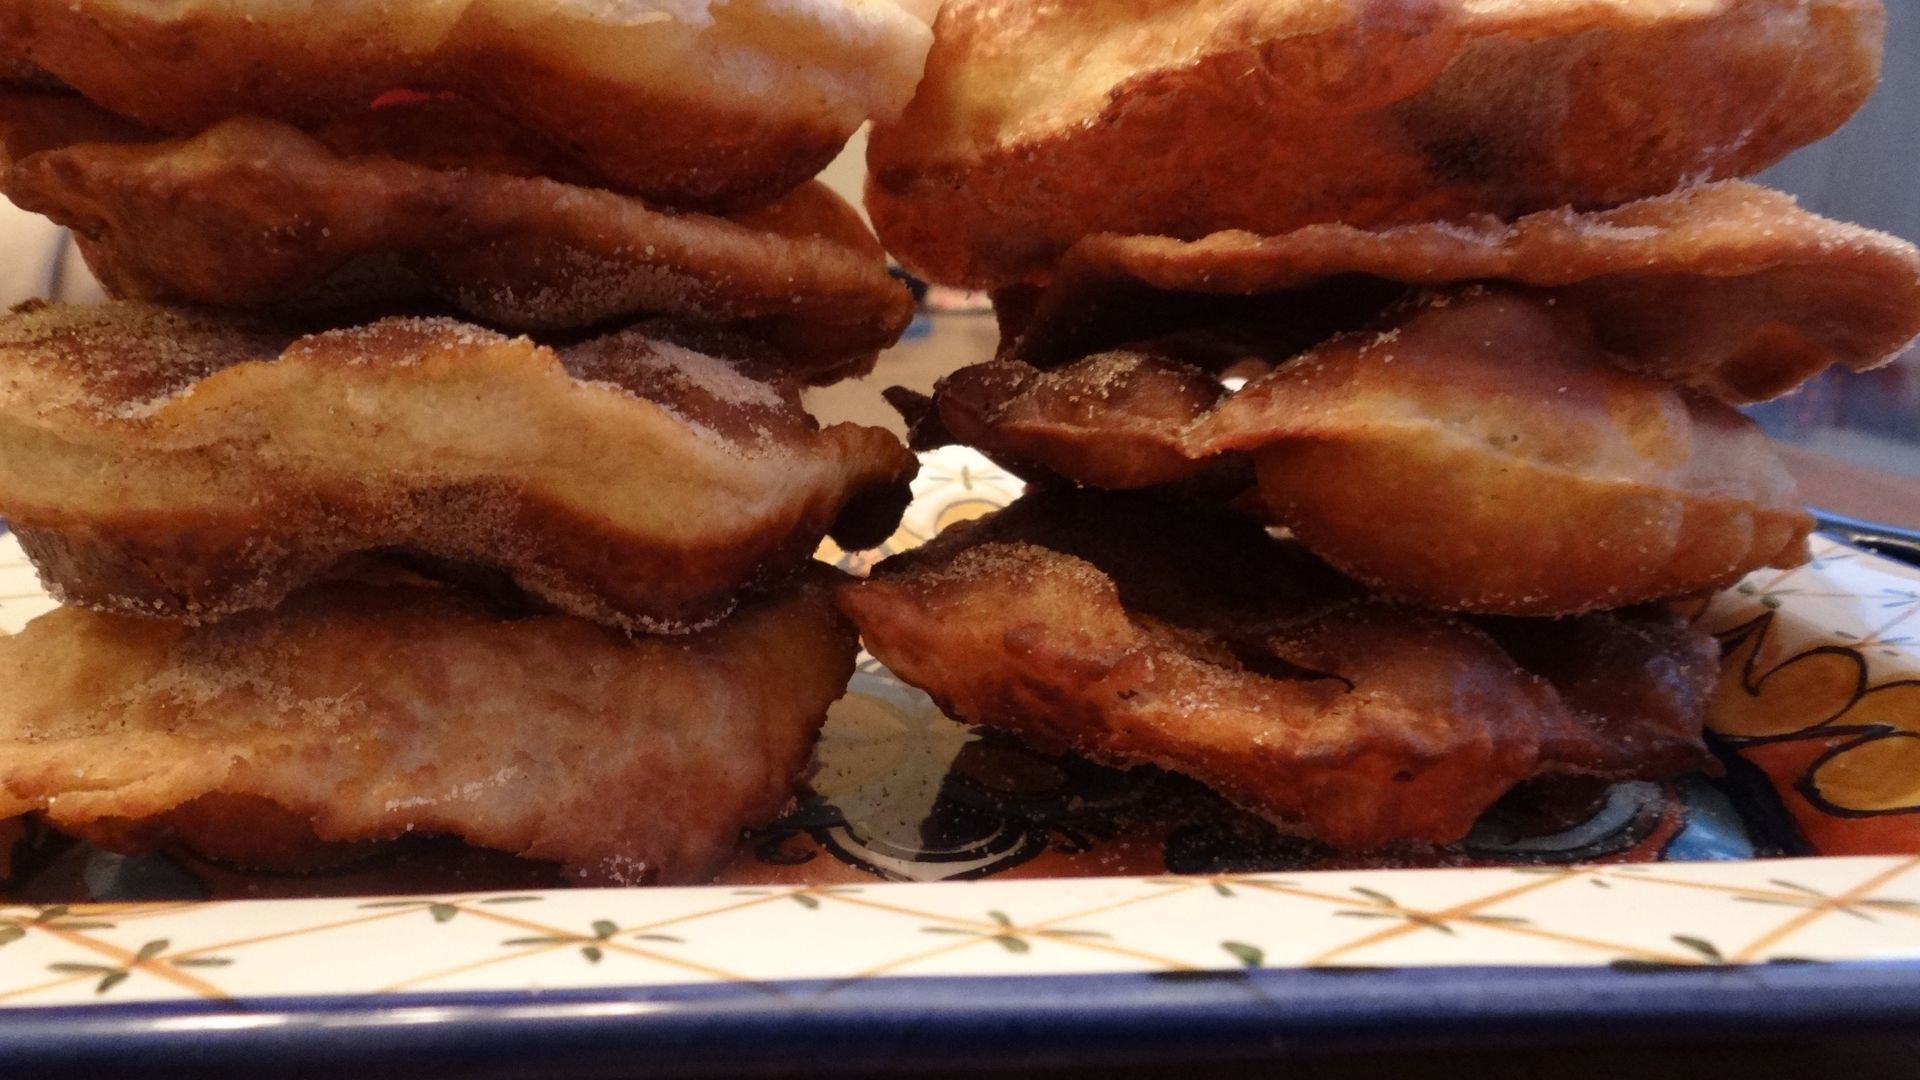
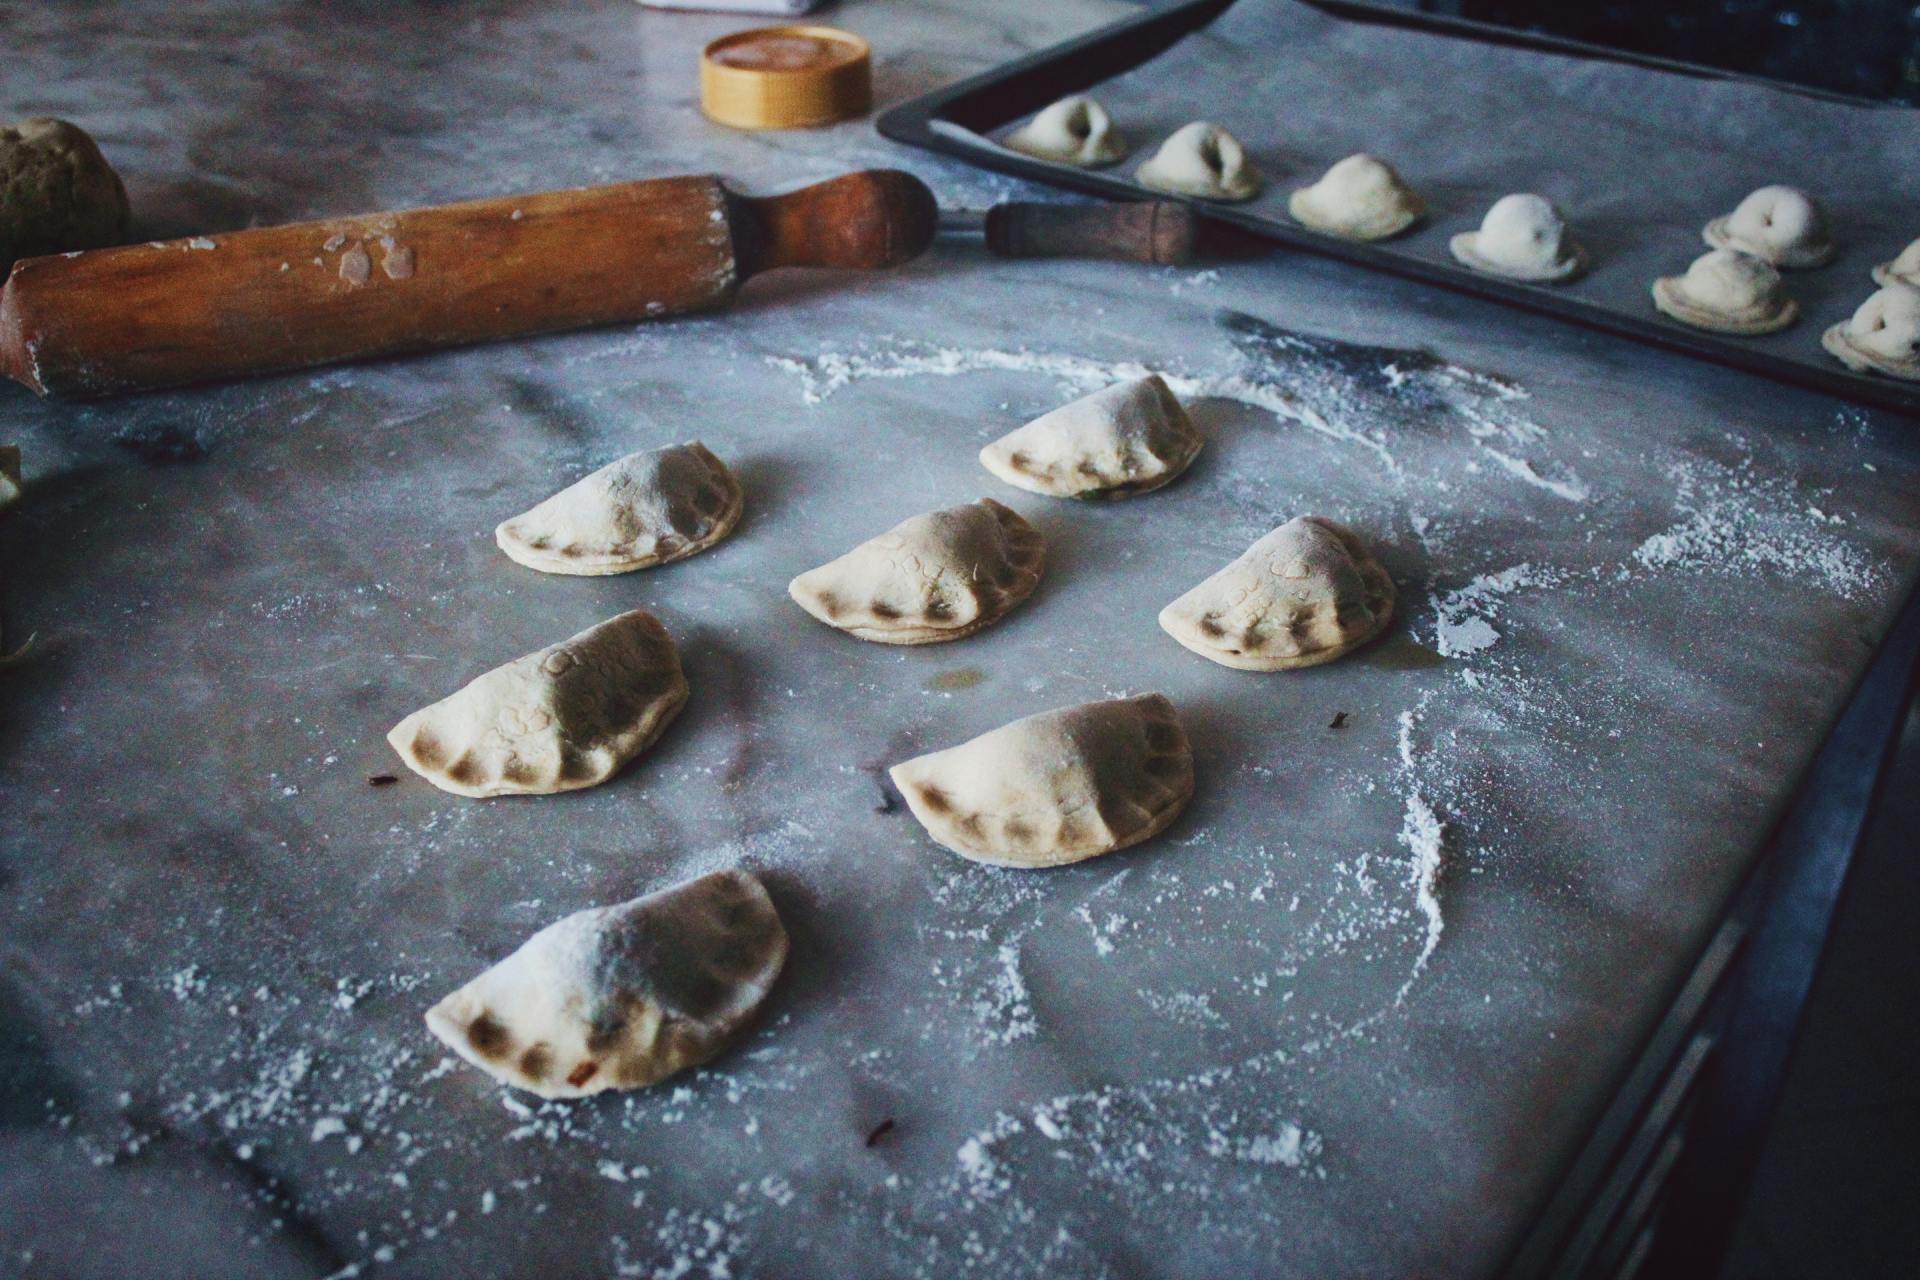
In 2012 I was fortunate to launch this website. And I’ve been so happy to work on lots of food writing assignments this year, as well as learn more about food photography. It’s been a great year and I want to thank all of your for your wonderful support. I can hardly wait to see what 2013 will be like. I wish each and every one of you a fantastic new year! For years, my family has made sure to eat plenty of black-eyed peas on New Year’s Day to ensure good luck and fortune all year long. Some years we eat cooked greens, as well. It’s so interesting to discover the different New Year traditions carried out in various regions and cultures. I’ve recently learned of a little fried treat called Bunuelos. They remind me of a cross between a flour tortilla and a sopapilla. Bunuelos are quite popular to have on New Year’s Eve to bring good luck in the year ahead. Some folks like to couple the bunuelos with a creamy cup of hot chocolate. I just had to give this a try. I invited the family over and fried up a batch. They were wonderful! I was quite inexperienced, some were shaped like hands, others were heart-shaped, and some resembled various continents around the world. But how can you go wrong with fried dough? My family ate them and they liked them. I was a little concerned when some of the dough disks started to puff up larger than I thought they would; I feared they would explode, but all went well. They were a hit. No one may know why bunuelos are considered to bring good luck but it’s a nice way to try! Have a happy, safe New Year. Enjoy food made fresh! Bunuelos 3 cups all-purpose flour 1 teaspoon baking powder 1 teaspoon salt 1 teaspoon cinnamon ¾ cup milk ¼ cup butter; lard or shortening may be substituted 1 teaspoon vanilla 2 eggs, beaten Shortening, lard, or oil for frying Extra sugar and cinnamon to sprinkle on bunuelos as they come out of the skillet Mix flour, baking powder, salt, and cinnamon; set aside. Place milk, butter, and vanilla in medium saucepan and bring to a slow boil over medium heat. Remove from heat. Temper the beaten eggs with 2 or 3 tablespoons of hot milk mixture before adding the eggs to the rest of the hot milk; this will keep the eggs from cooking in the hot liquid. Whisk together until well blended. Slowly add milk and egg mixture to dry ingredients. Mix until dough ball forms. Turn dough onto floured surface and knead 2 to 3 minutes. Divide into 20 balls. Heat oil, lard or shortening in skillet, (oil should be about 1 inch deep). Roll dough balls out into 6 to 7 inch circles. Fry in hot grease over medium to medium-high heat. You will know if grease is hot enough when bubbles puff up on the bunuelos. Brown one side and flip to brown other side. Remove from skillet and stand upright in bowl lined with paper towels. Sprinkle with cinnamon and sugar mixture while still hot. Repeat. Makes 20 bunuelos.
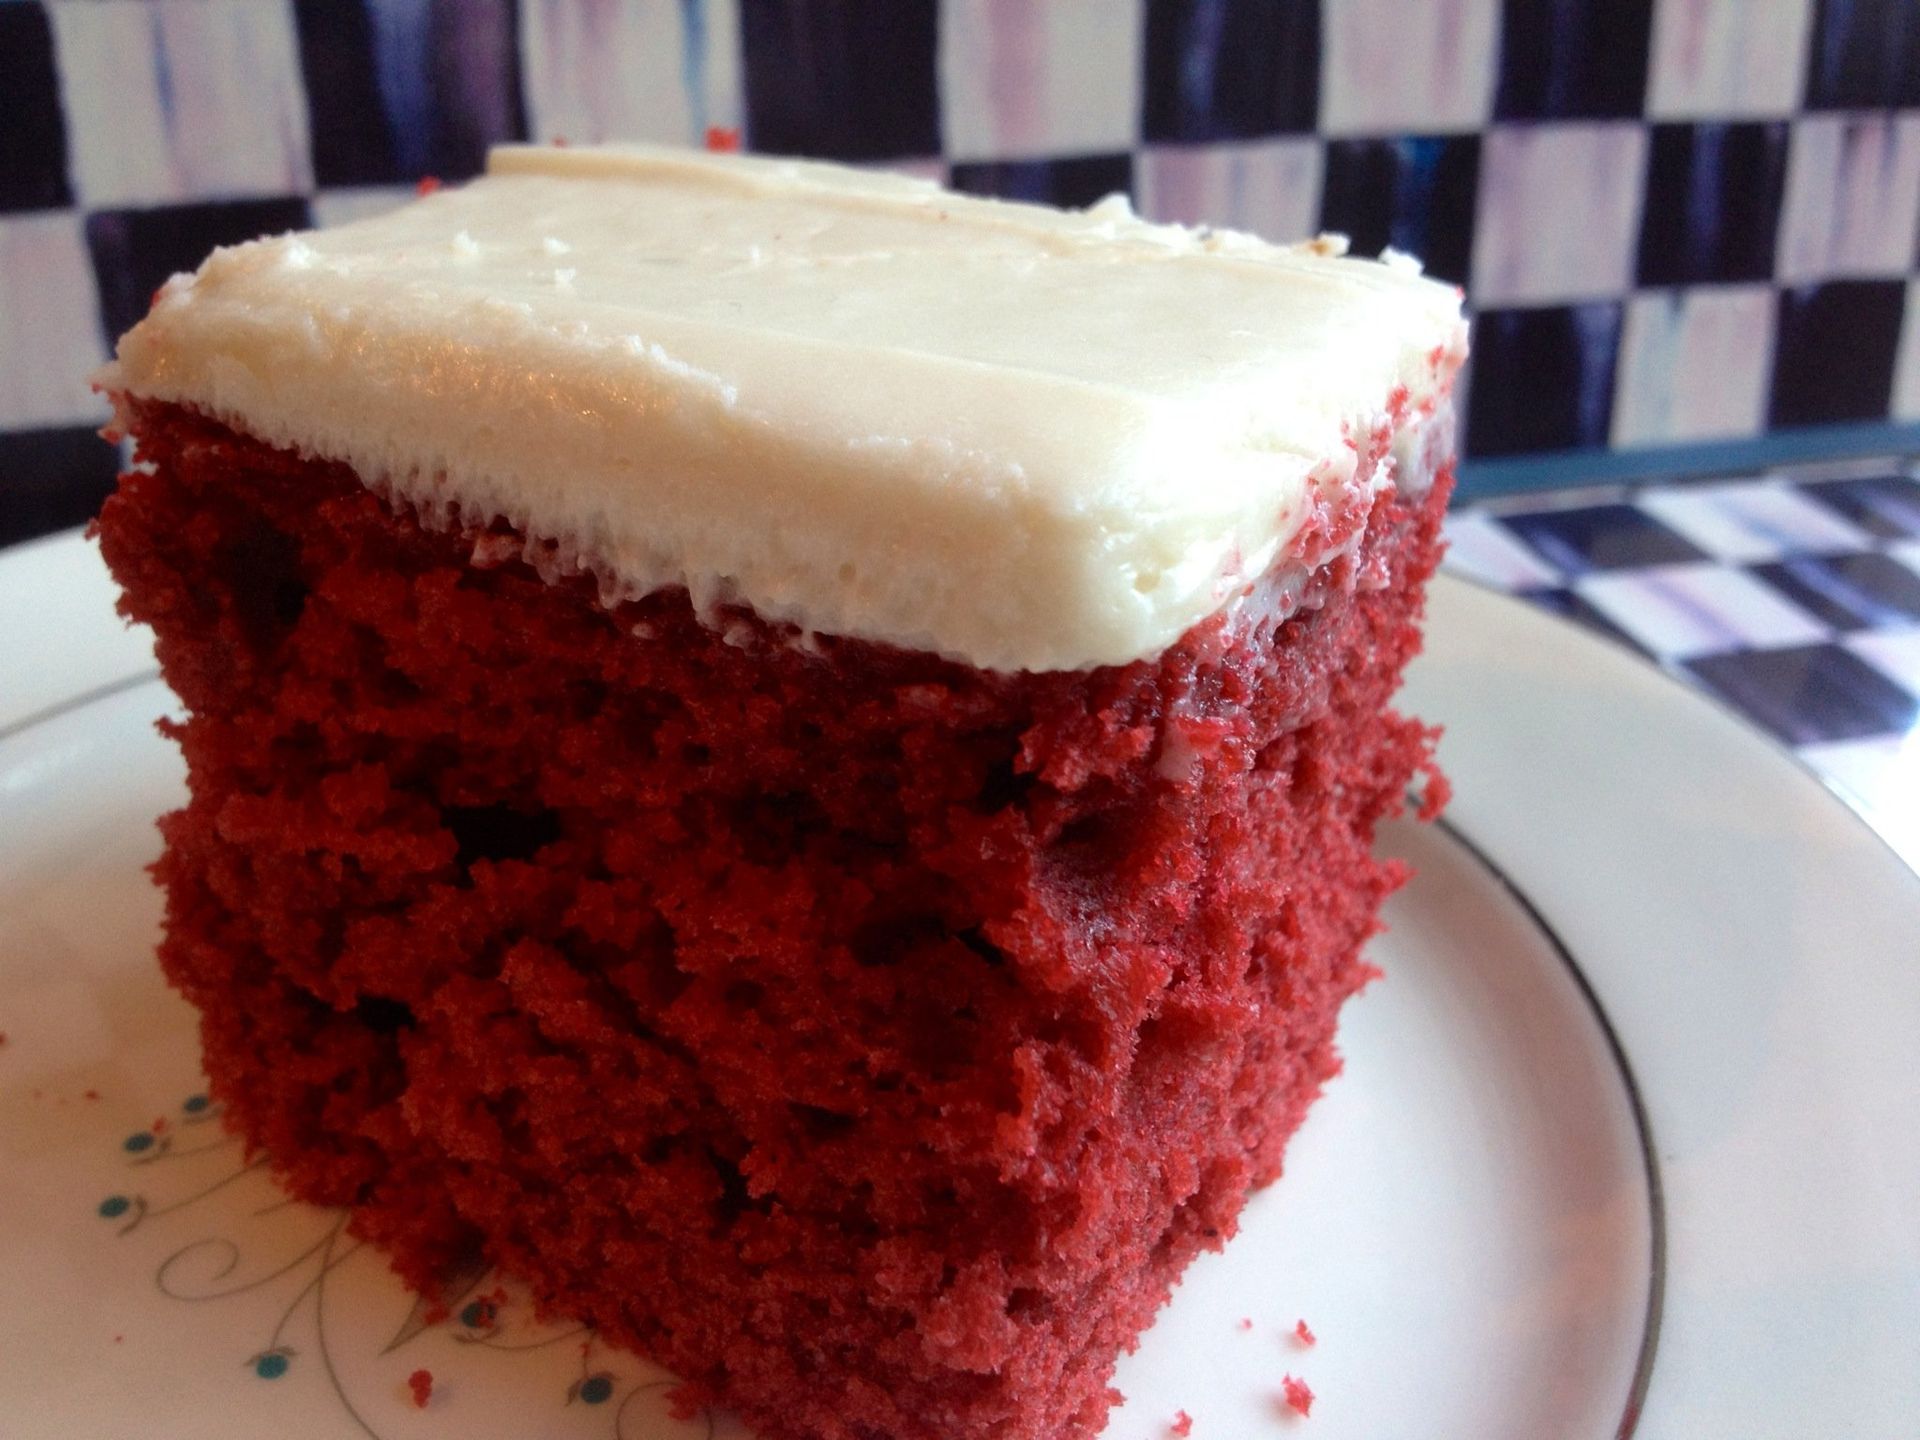
Desserts and other sweets tend to take center stage during the holidays, especially for Christmas. While I typically concentrate on baking Christmas cookies, and candy making, it’s nice to have a beautiful cake to place high upon the cake stand I only take out and use once or twice a year. Red Velvet Cake is the perfect choice for that kind of drama and has made a fervent return to the trendy world of baked goods. I attribute it to the cupcake craze we’ve seen around the country for a couple of years. But right now, I’m also seeing red velvet pancakes, waffles, whoopie pies…….even red velvet brownies. There’s something visually appealing about the dramatic contrast between the creamy white frosting and the deep red color inside the cake. And the cocoa adds that rich, inviting flavor, bite after yummy bite. Most say the name came from the fact that the chemical reaction from the acidity of the vinegar and buttermilk mixed with the compounds of cocoa cause a slightly red hue. During World War II, many bakers used beet juice to intensify the color. Red Velvet Cake became very popular in the south when, during the Great Depression, Texas-based company, Adam’s Extract, became one of the first to sell bottled food coloring. If you are not inclined to deal with a layer cake during this busy baking season, this recipe adapts well to a 9-by-13 inch pan and your guests will be just as delighted. Use an ornamental piece of holly to dress it up and you will have a splendid addition to your holiday table. Enjoy food made fresh! Red Velvet Cake 2 2/3 cups flour 1 teaspoon baking soda 1/3 cup cocoa powder 1/2 cup butter, softened 1 cup vegetable oil 2 cups sugar 4 eggs 1 ounce red food coloring 1 teaspoon vinegar 1 teaspoon vanilla 1 cup buttermilk Mix flour, baking soda, and cocoa. In a separate mixing bowl with electric mixer, cream together, butter, oil, sugar, and eggs. Add food coloring, vinegar, and vanilla. Add other ingredients, alternating one half of the buttermilk, then half of the flour mixture then repeat, just until well combined. Preheat oven to 350 degrees. Spray 2 – 9 inch cake pans with non-stick cooking spray. Cut 2 – 9 inch circles from parchment paper and place in pans on top of cooking spray. Spray again coating the paper and the sides of pan, then dust lightly with flour. Pour half the batter into each pan. Tap pans on counter to release bubbles. Bake for 40-50 minutes, testing to see when toothpick inserted into middle of cake comes out clean. Cool then remove from pans and frost (recipe follows). Cream Cheese Frosting 2 – 8 ounce packages cream cheese, softened 1/2 cup butter, softened 1 tablespoon vanilla 6 cups powdered sugar Mix all ingredients with electric mixer until well blended and smooth. If mixture is too thick, add a tablespoon of milk at a time until you reach desired consistency. If too thin, add a little powdered sugar at a time until spreadable. NOTE: When baking this recipe in a 9-by-13 inch pan, use half the frosting recipe.
